
Apple ID is an account used by Mac and iOS users to log in to their devices. The ID is also used to access the services provided by Apple. The procedure to change Apple ID is simple. You can also change your Apple ID anytime you want. But, If your Apple ID ends in @mac.com, @me.com, or @iCloud.com, it cannot be changed. The reason for changing your email ID will be that you want a fancy username or that you don’t like the existing username. However, You will find details about how to change Apple ID on Mac in this tutorial. Learn how to do it by getting into this section.
How to Change Apple ID on Mac using Your Browser
First, you need to sign out of all the iCloud services and devices linked with the Apple ID. You could follow the procedure given below to change your Apple ID.
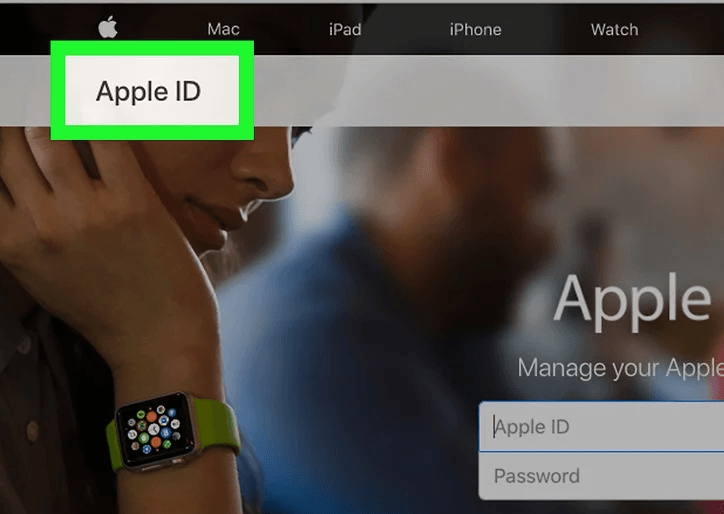
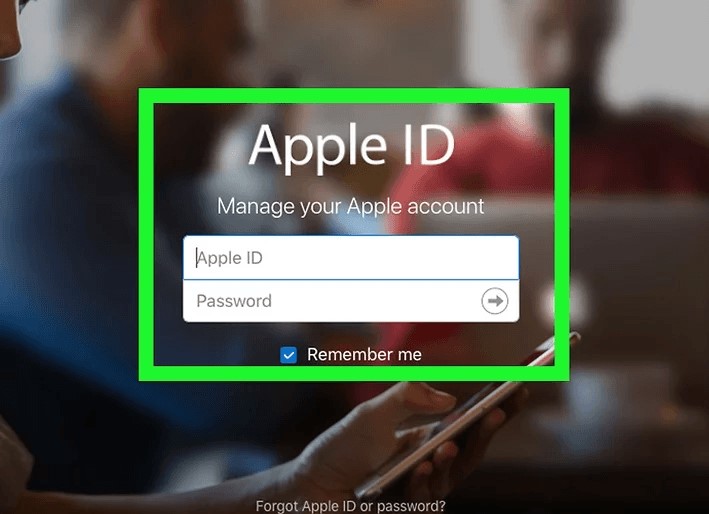
1. Go to the official website of Apple (appleid.apple.com) to change your Apple ID. Your Apple ID will usually be [email protected].
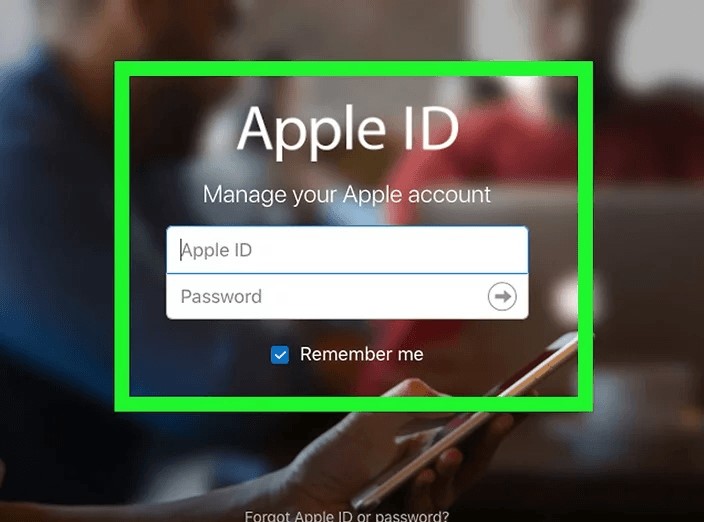
2. Sign in using your Unique Apple ID and password.
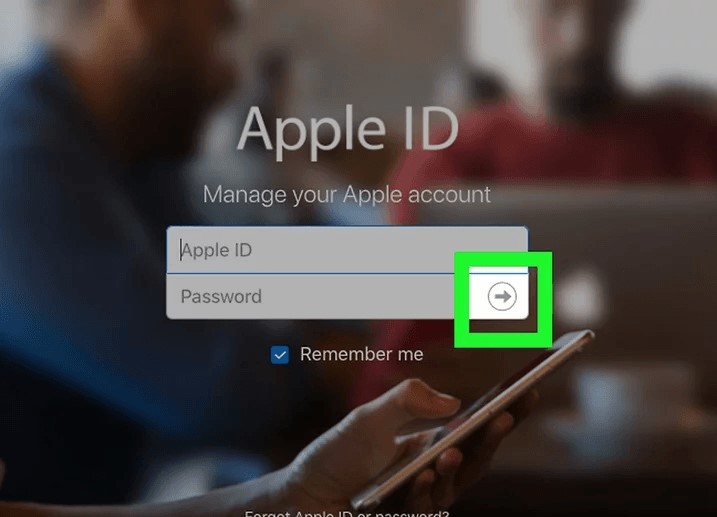
3. Tap the Enter symbol that is on the right side of the password field. If you have enabled the two-factor authentication, give access to Sign in another device or enter the verification code to sign in to your account.
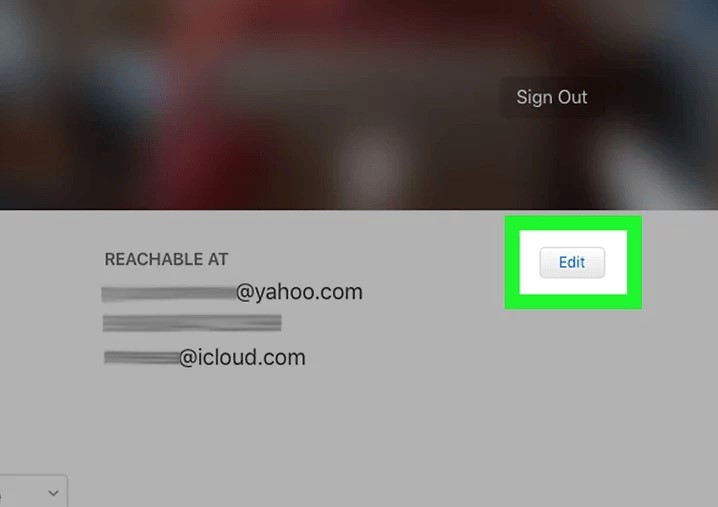
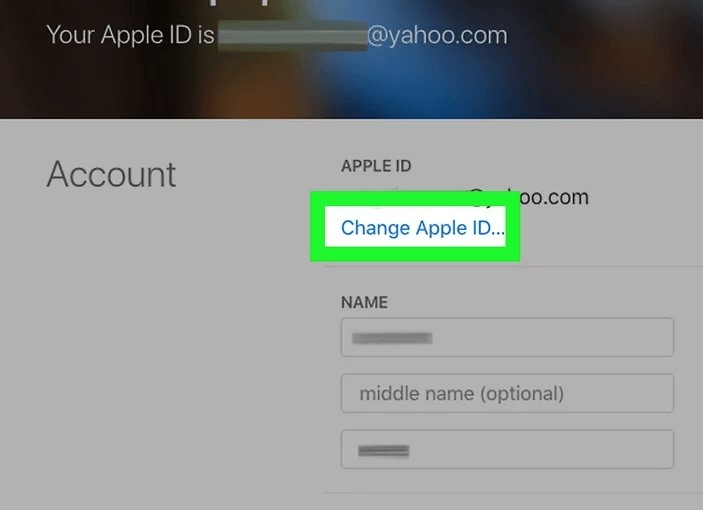
4. Go to the Account section and under it, select the Edit button to edit your account information.
5. Your account information will display on the screen. On the top will be your Apple ID. Under your ID, you will have an option to change your Apple ID. You will not find the ‘Change your Apple ID option’.
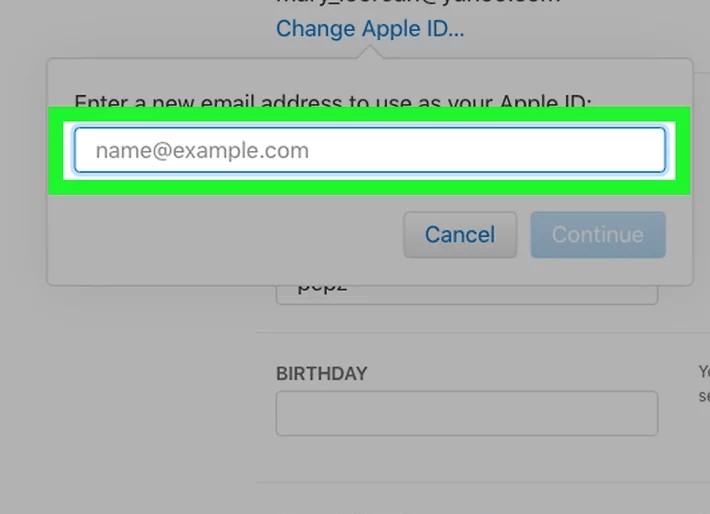
6. Enter your new Apple ID. Use an ID that is not contradicting others. Then, answer the security questions to set up your new Apple ID.
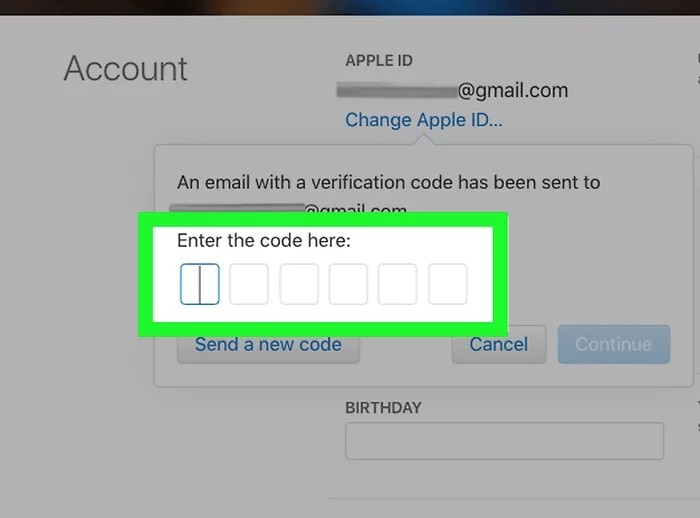
7. Tap on Next, and Apple will send you a security code. Check your mail for the code to enter it on the browser in respective boxes.
8. That’s all. You have now changed your Apple ID. Use this ID to sign in to your Mac devices. If you enabled two-factor authentication, enter the security code received from your other Apple device to sign in successfully. You will not lose any data for changing your Apple. Data loss will happen only when you create one. With this, the data associated with your old Apple ID will be retained.
Related: How To Update iTunes on Mac to Latest Version [All Ways]
Bonus: How to Login With a Different Apple ID on Mac
After you change the User ID, you need to log in again using your new Apple ID. First, you have to log out of your old account. There are multiple ways that you can log in with a different Apple ID. They are:
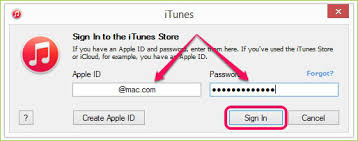
Change Apple ID on Mac in iTunes
1. Go to the iTunes application on your Mac.
2. Click on the Account located at the top of the Menubar near the help option.
3. Then, select Sign in from the drop-down menu.
4. You will be required to enter your password and your Apple ID.
5. Click on the signing option to log in with your new Apple ID.
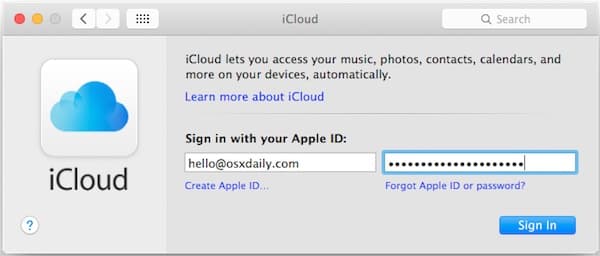
Change Apple ID on Mac using iCloud
1. Click on the Apple logo on your macOS available at the top left of your screen.
2. Click on System Preference from the drop-down menu.
3. Select iCloud from the System Preference section and enter your Apple ID and your password.
4. Tap on Sign In to log in with your new Apple ID.
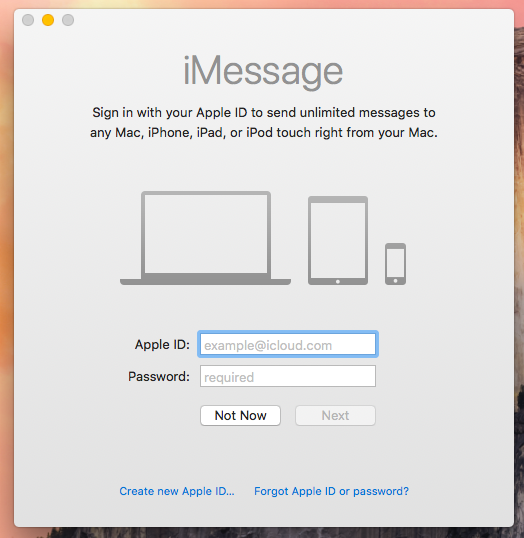
Change Apple ID on iMessages
1. Use the finder to search for the Message app on your Mac.
2. Open the Message app from the search appearance.
3. Provide your Apple ID and password. Tap on Next to log in with your new Apple ID.
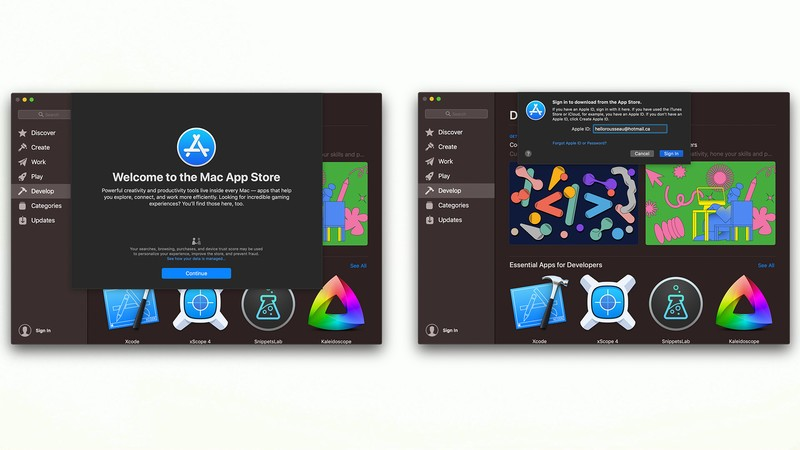
Change Apple ID on the App Store
1. Open the App Store on your Mac.
2. Tap on the Sign-in option in the lower-left corner of the interface.
3. Enter your Apple ID and password and tap on Sign in to log in with your new Apple ID.
These are the steps to change your Apple ID on Mac. Hope you found this section helpful and interesting. For more such useful article updates, you shall visit our blog.