
Apple has developed a Safety Check feature for the iPhone, which works with the iOS 16 version. The feature is developed to support someone who happens to be in a precarious situation. The Safety Chech feature will help you eliminate anyone who subjects you to any abuses or discomforts.
Safety Check – An Outline
Safety Check is one of the important features designed especially for people who are at risk of domestic abuse. With the Safety Check feature on iPhone, you can immediately change or stop sharing permissions using quick access. So, you need not reach out to various settings scattered on iPhone. With Safety Check Feature, you can revoke sharing your locations, Face ID, and passcodes granted to any iPhone apps and persons. In other words, you will have control of the apps and whom you have given access.
How to Use Safety Check Feature on iOS 16
Let’s see how we can use the Safety Check feature here. There are two ways to use the Safety Check feature,
- Emergency Reset
- Manage Sharing & Access
Emergency Reset
Emergency Reset is a kill switch to immediately stop sharing the specific or all the access you have granted. It includes apps and people on your iPhone. If you feel abusive or insecure about a person’s behavior, you can stop sharing your data, like your location. To use the Emergency Reset option on iPhone,
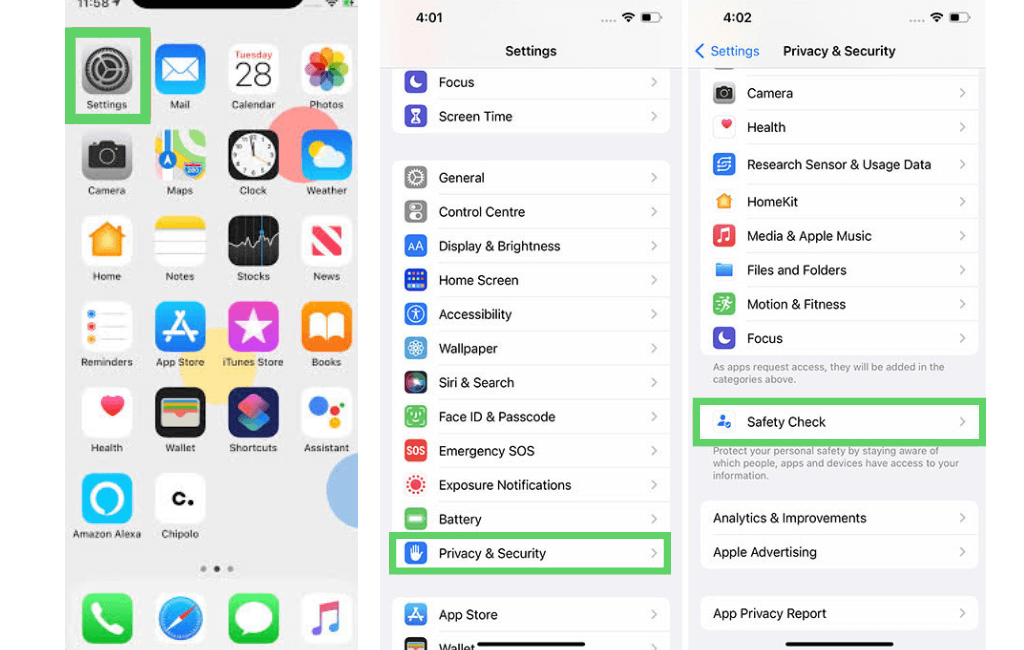
1). You can unlock your iPhone Face ID, go to iPhone Settings and choose Privacy and Security.
2). Under Privacy and Security options, select Safety Check.
3). Next, select the Emergency Reset option from Safety Check.
4). Now, you are prompted to verify your identity with any of the credentials, including a Face ID, Touch ID, or a Passcode.
5). After verification, enable the Start Emergency Reset option by tapping on it.
6). After enabling the Start Emergency Reset, tap on Reset People & Apps to no longer want to share your location, Photos, or any other personal data on your iPhone with any applications and people. Again, click Reset to confirm the action.

7). Next, select the device from the list you want to remove from the Apple ID and then click Remove Selected Devices to sign out the devices from the Apple ID.

8) Then, you must select your account’s trusted phone numbers. You can also remove the existing phone numbers from the list if needed. Then click Continue.
9). You can also reset your Apple ID when you have already shared it with the person you suspect to be abusive.
- To reset Apple ID, you can change your password by choosing the Update Password button. Alternatively, keep the same password by choosing the Update Later in the Settings option.
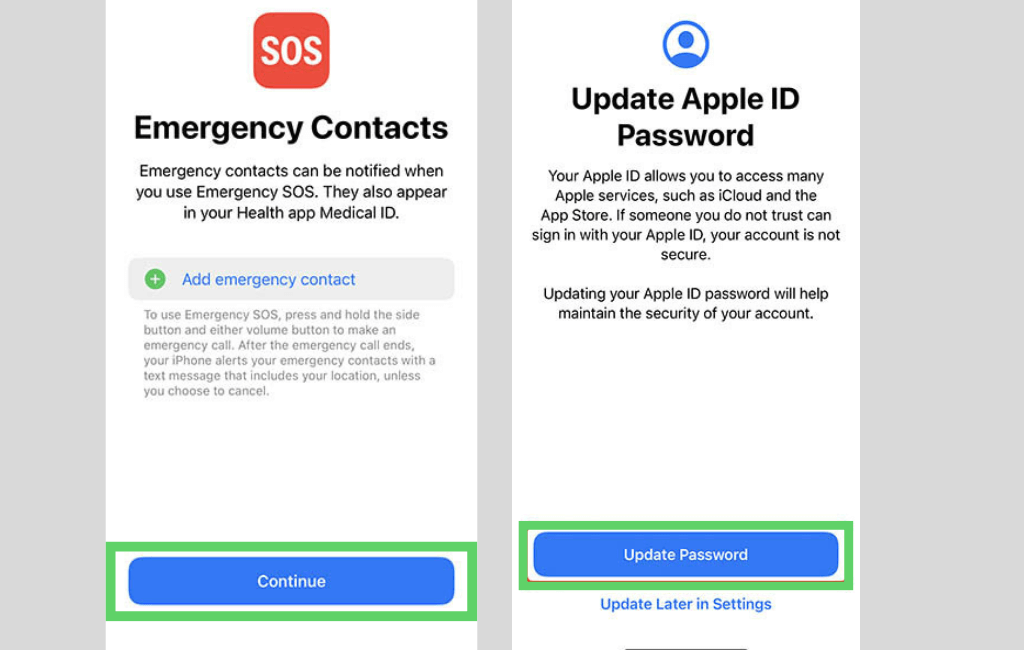
10) Finally, you have to select your Emergency contacts. Choose the phone numbers of the persons in your family or friends circle who can lend a helping hand when you’re in trouble. Because in an emergency, when you intend to use the SOS Emergency feature, you will get notified with these emergency contacts. After adding the emergency contacts, tap on Continue.
After completing all the above steps, complete the Emergency Reset procedures by clicking Done.
Manage Sharing & Access
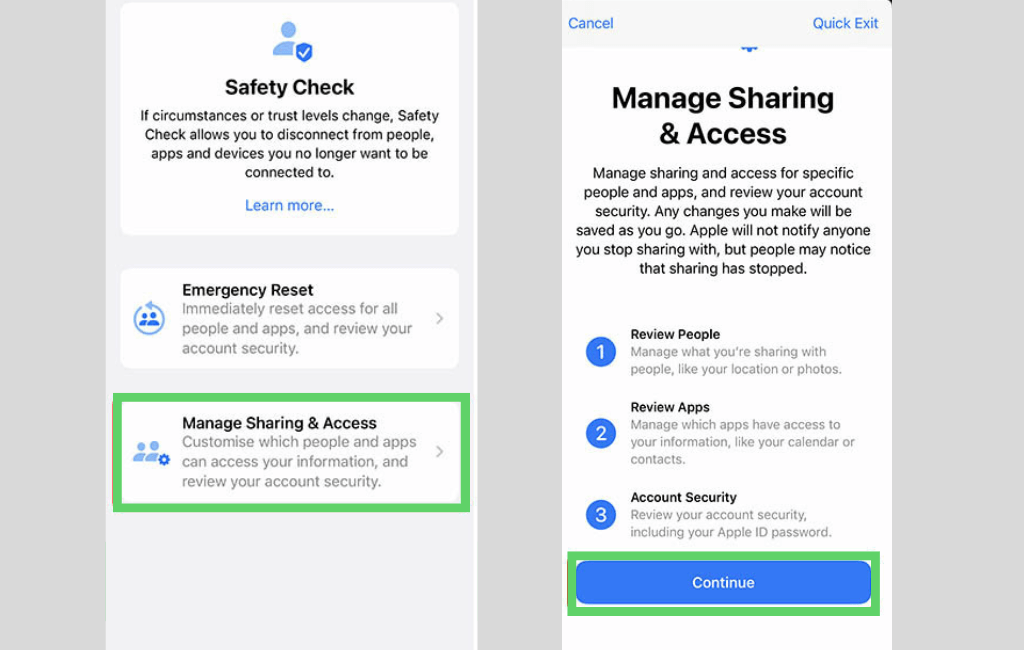
You can use the Manage Sharing & Access feature to revoke sharing your permissions from a particular abusive person. Let’s see how to use Manage Sharing & Access feature on your iPhone.
1). On your iPhone, go to Settings and select Privacy and Security, followed by Safety Check.
2). Now, choose Manage Sharing & Access, and then tap on Continue.
3). Then, follow the same steps mentioned in the Emergency Reset. Thus, you can stop sharing your permission, Resetting Apple ID, set Emergency Contacts, and Update the Password.
While using the Safety Check feature, you can instantly close it by tapping on the Quick Exit button. More importantly, the iPhone will not inform anybody about your revoking permissions to ensure the user’s safety and privacy. Meanwhile, you shall learn to approve iPhone/iPad in different ways.
Frequently Asked Questions
To turn off emergency SOS on your iPhone, open the Settings app on your iPhone with iOS 16 and then choose Emergency SOS. Now, turn off the Auto Call option.