
Apple releases new features now and then to make the users comfortable with Apple products. In that list, Apple released a new accessibility feature called AssistiveTouch for Apple Watch, which comes with watchOS 8. AssistiveTouch allows the Apple Watch users to control the watch without touching the display. Instead, it uses a gyroscope, accelerometer, and optical heart rate sensor of the Apple Watch. With AssistiveTouch, you can access settings, answer calls, do workouts, activate Siri, use Apple Pay, navigate different menus and apps on the watchOS with a hand gesture. AssistiveTouch is released especially for users with limited mobility or limb differences, but it will be helpful for all users. Further, AssistiveTouch is available only on Apple Watch SE and Apple Watch Series 6 and later. The blog guides you on setting up and using AssistiveTouch on Apple Watch.
How to Set Up AssistiveTouch on Apple Watch
To set up AssistiveTouch on Apple Watch, you must have installed watchOS8 on it. Further, you must own an iPhone which runs on iOS 15 or later. Here is the detailed procedure.
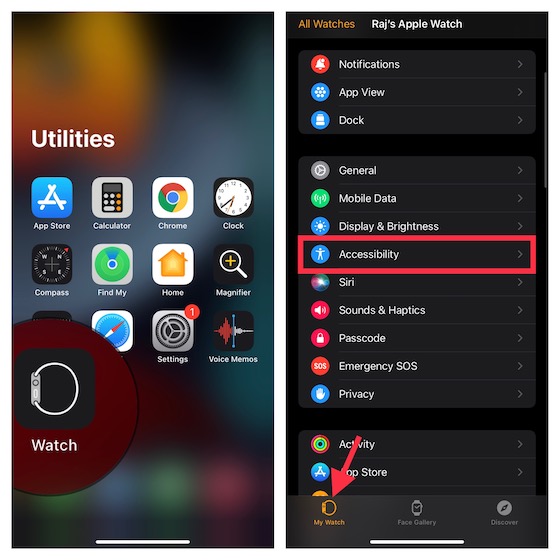
1. Open the Watch app on your iPhone.
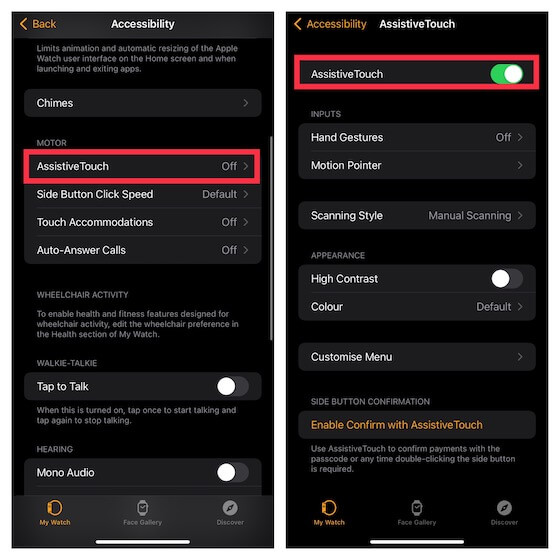
2. Select Accessibility and then AssistiveTouch under the Motor section.
3. Toggle the Switch next to the AssistiveTouch and confirm your setting if asked.
How to Adjust Hand Gestures for AssistiveTouch on Apple Watch
1. Open the Apple Watch app on your iPhone.
2. Select Accessibility and select AssistiveTouch from the Motor section.
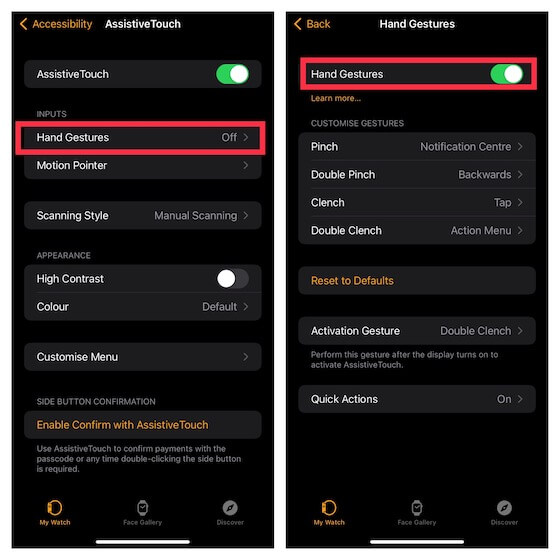
3. Select the Hand Gestures under Inputs. Sometimes, this toggle may be turned on by default.
4. Then, change the settings for Pinch, Double Pinch, Clench, and Double Clench from Customize Gestures. The defaults are Forwards, Backwards, Tap and Activate Menu.
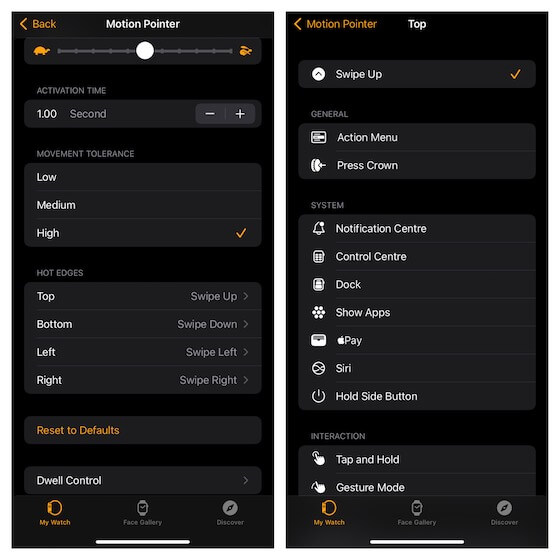
How to Adjust the Motion Pointer for AssistiveTouch on Apple Watch
By adjusting Motion Pointer in the AssistiveTouch, you can navigate on the Apple Watch with tilt.
1. From the Watch app on your iPhone, select the Accessibility option.
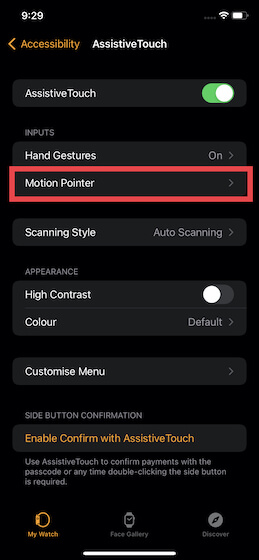
2. Next, select AssistiveTouch from the Motor section.
3. Under that, choose Motion Pointer.
4. Then, adjust Sensitivity, Activation Time, and Movement Tolerance when applicable.
5. Further, change Top, Bottom, Left, and Right under Hot Edges. (Default options include Swipe Up, Swipe Down, Swipe Left, and Swipe Right )
How to Adjust the Assistive Touch Appearance on Apple Watch
1. Launch the Watch app and go to Accessibility.
2. Select AssistiveTouch from the Motor section.
3. Now, toggle the High Contrast under Appearance and select Color.
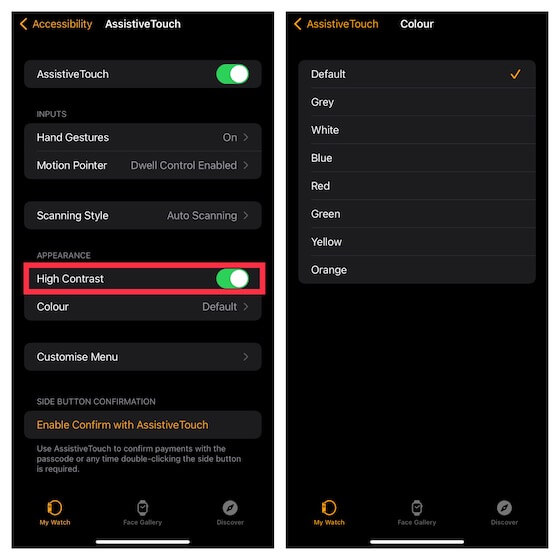
4. Then, select a new color from the list of options. The default color is set to Blue.
How to Customize AssistiveTouch Scanning Style
AssistiveTouch has both automatic and manual scanning, and you can also adjust the speed of auto-scanning.
1. Open the Watch app and go to Accessibility >> AssistiveTouch.
2. Select Scanning Style.

3. Next, you will get two options to select from Automatic and Manual.
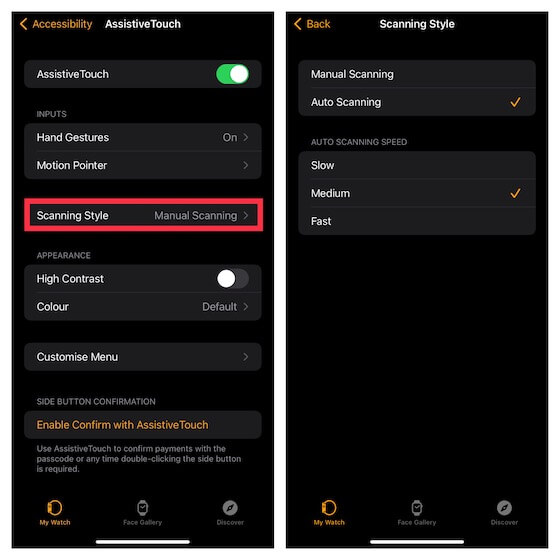
4. If you select Auto Scanning, you will get three auto scanning options: Slow, Medium, and Fast.
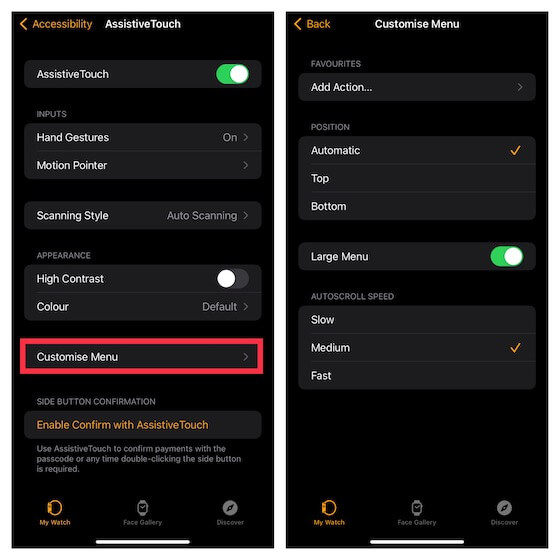
How to Customize AssistiveTouch Menu
1. Go to Watch app >> Accessibility >> AssistiveTouch.
2. Tap Customize Menu and fine-tune the AssistiveTouch menu as per your wish.
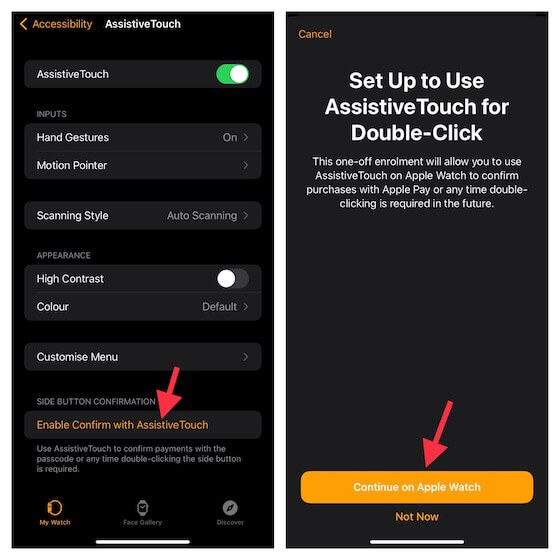
How to Use AssistiveTouch to Confirm Payments
1. Open to Watch app >> Accessibility >> AssistiveTouch.
2. Navigate to the Side Button Confirmation section. Then, select Enable Confirm with AssistiveTouch.
3. Next, tap Continue on Apple Watch to confirm.
That’s it. Now, you can set up and use AssistiveTouch on Apple Watch easily. Though it is a gesture-based feature, it offers plenty of customization options. Along with AssistiveTouch, Apple also released eye-tracking support for the iPad. So, the user can comfortably control the iPad without hurting the eyes. Hope this article benefits you. To learn more interesting tips and tricks of Apple products, visit our blog.