
Undoubtedly, everyone will accept that AirPods are the best wireless earbuds to enjoy songs or audio in a better way. It includes unique features to provide the users with the best audio quality. One of the amazing features that AirPods Pro and AirPods Max include is noise cancellation. With AirPods charged, the user can listen to the music or audio with or without hearing the external noise. In other words, Noise Cancellation reduces the ambient noise you hear while using AirPods Pro. i.e., the user will hear less of natural noise when the feature is enabled. To use this impressive feature, one should know to turn on Noise Cancelling on AirPods. As the procedure to turn on noise-cancelling for AirPods Pro and AirPods Max can be done from iPhone, iPad, Apple Watch, and Mac, the article covers everything in detail.
Important Note: The standard AirPods don’t include a noise cancellation feature, and you cannot use it.
Noice Control Modes: Explained
AirPods Pro and AirPods Max support Noise Cancelling with three noise control modes: Active Noise Cancellation, Transparency Mode, and Off.
AirPods come with two mics, an inward-facing mic and an outward-facing one. Upon using Active Noise Cancellation mode, the outward mic listens and cancels the external sound before you listen to it with anti-noise. Also, the inward mic listens for sound inside the ear and cancels them with anti-noise.
However, with the AirPods Transparency mode, you will be able to hear the sounds around you. The user can switch between noise cancellation, transparency mode, and the default mode.
How to Turn On Noise Cancelling on AirPods
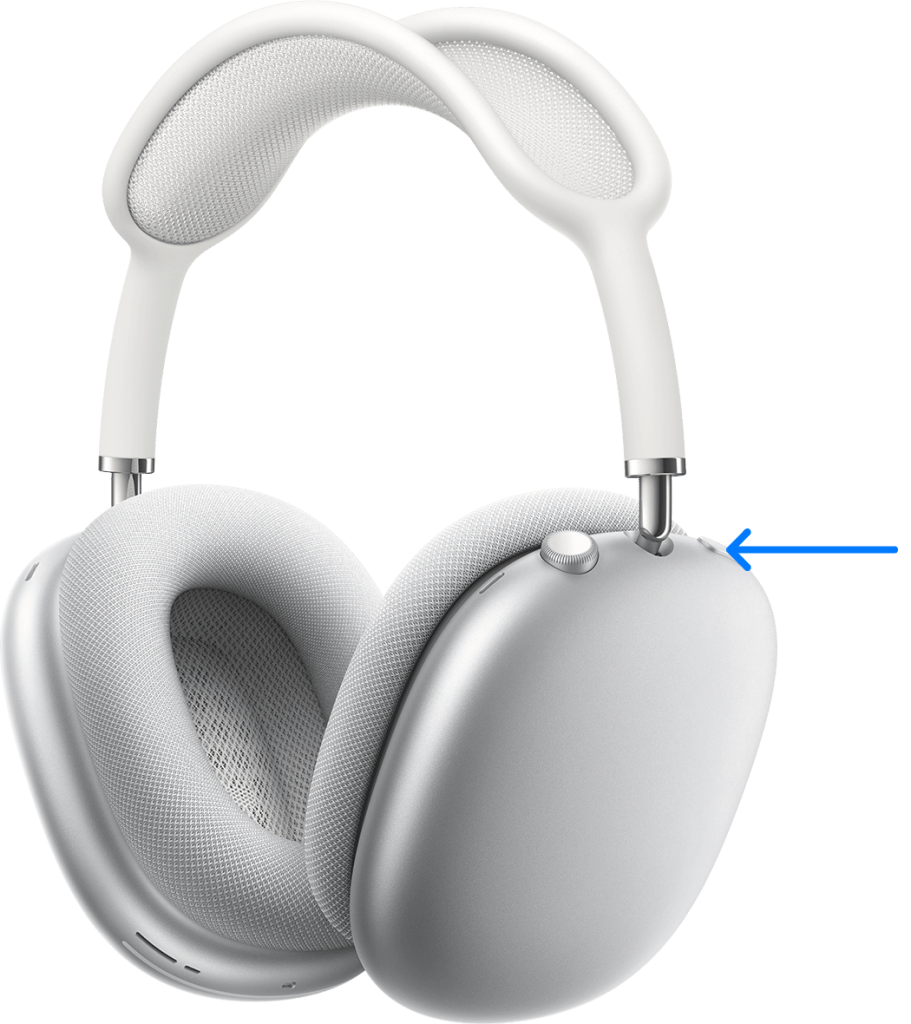
If you are using AirPods Max, you can use the noise control button to switch between noise cancellation and transparency mode. The procedure given below will help full to turn on the noise cancelling on your AirPods Pro.
Pro Tip: It is recommended to check your AirPods battery to never miss a beat of your favorite songs or to enjoy private listening.
Turn On Noise Canceling on AirPods Pro using iPhone/iPad
On iPhone or iPad, you can turn on the noise cancelling in two ways:
- From Control Center.
- Using Settings.
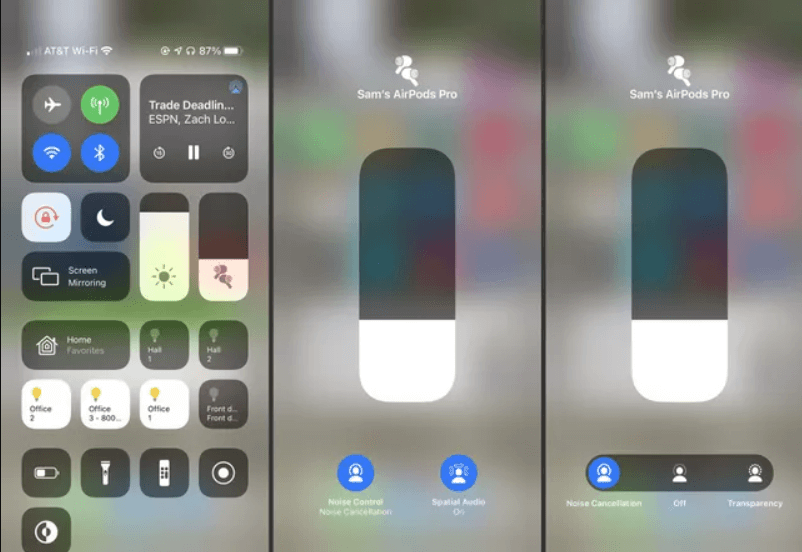
Turn on Noise Cancelling from Control Center
1. First, connect the AirPods to your iPhone/iPad.
2. Open the Control Center on your iPhone/iPad.
3. Long press the Volume Slider and tap the Noise Control option.
4. Then, choose the Noise Cancellation option.
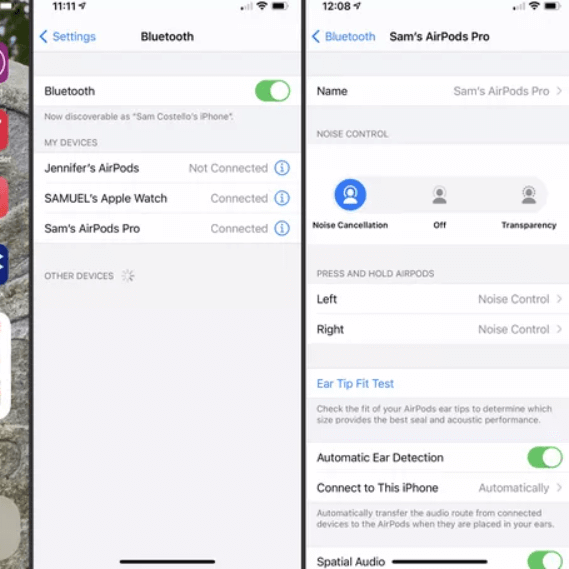
Turn on Noise Cancelling via Settings
1. On your iPhone/iPad, navigate to Settings.
2. Tap Bluetooth, and then click the ‘i‘ icon next to your AirPods name.
3. From the Noise Control section, choose the Noise Cancellation option.
Did You Know: You can even connect AirPods to Apple TV to experience the best audio.
How to Turn On Noise Cancelling on AirPods Pro 2 using Mac
Like iOS, you can turn on noise cancellation on AirPods from your Mac in two ways:
- Using Force Sensor in the stem of AirPods.
- With the Volume option from the menu bar.
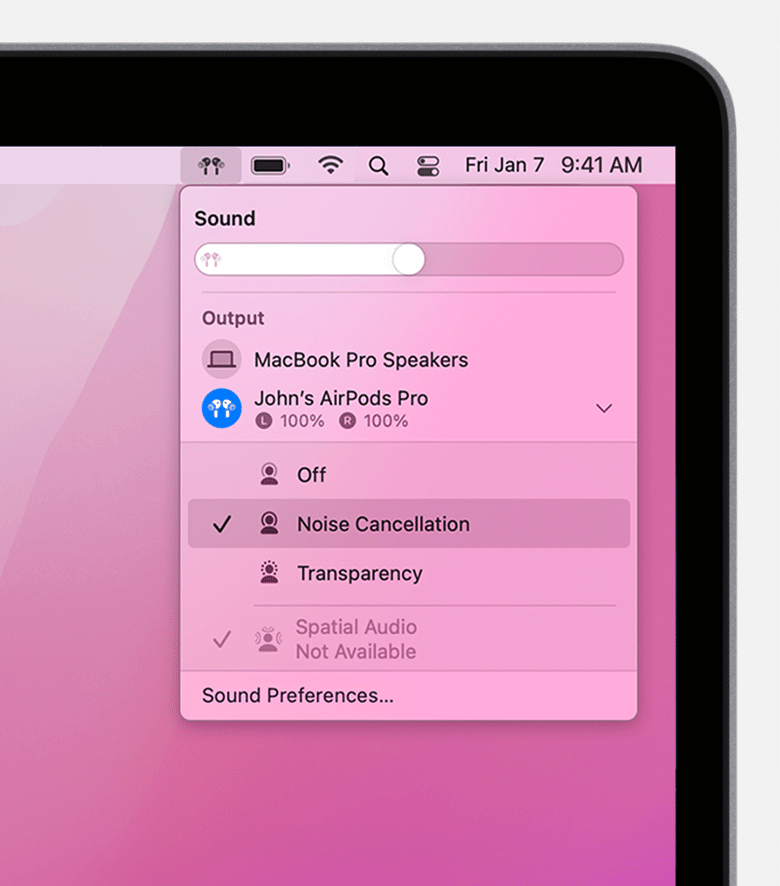
From Menu Bar
1. Tap the Volume button from the Mac menu bar and choose your AirPods.
2. From the menu bar that appears, click on the Noise Cancellation option.
Note: If you don’t find the volume button on the menu bar, navigate to the Apple menu >> System Preferences >> Sound >> Output and check the box next to the option, Show Volume in Menu bar.
Force Sensor
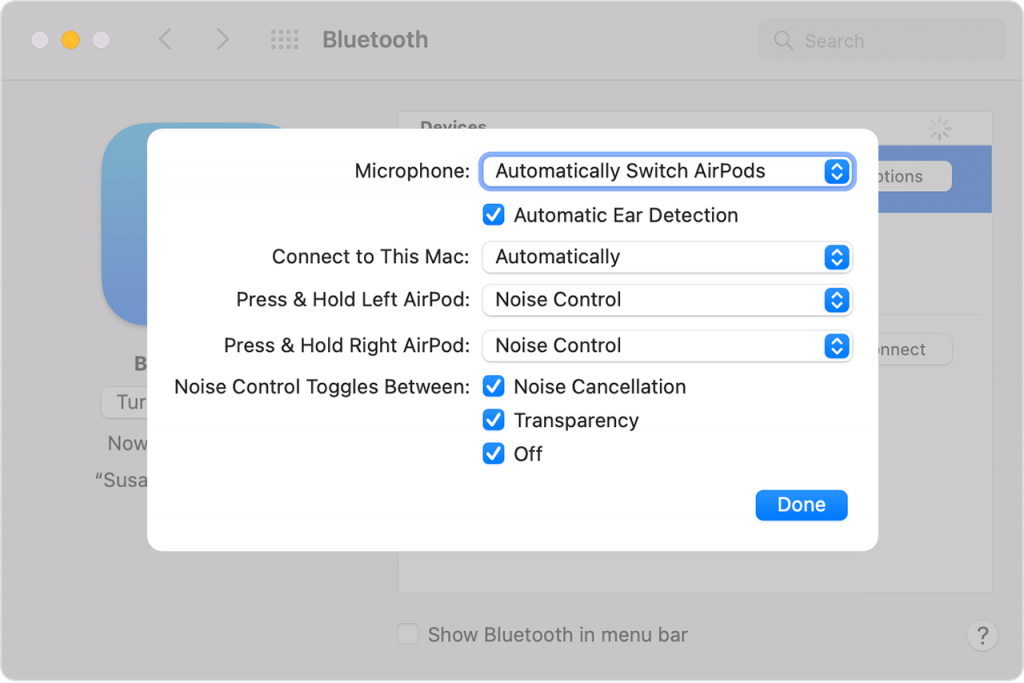
Alternatively, you can turn on noise cancellation by holding the Force Sensor in the stem of AirPods Pro. As said earlier, you can switch between noise cancellation, transparency mode, and default mode. So, to turn on noise cancellation, you have to remove the transparency mode in System Preferences. To do so,
1. Tap the Apple menu and choose System Preferences.
2. Click on the Bluetooth option.
3. Select the Options button next to your AirPods.
4. Then, uncheck the Noise Cancellation option.
How to Turn On Noise Cancellation on AirPods using Apple Watch
1. Tap the AirPlay icon on your Apple Watch while listening to audio.
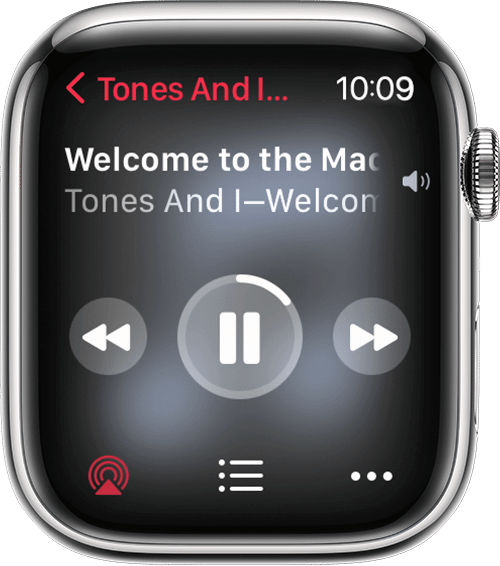
2. Choose the Noise Cancellation option from the watch screen.
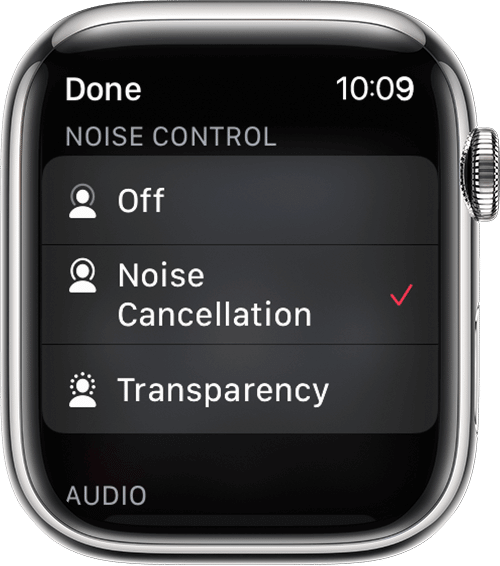
3. Now, you have turned on Noise Cancellation on your Apple Watch.
How to Turn On Noise Cancelling on AirPods without iPhone/iPad
If you don’t have an iPhone/iPad, you can turn on the noise cancelling on your AirPods.
1. Press and hold the stem of the AirPods.
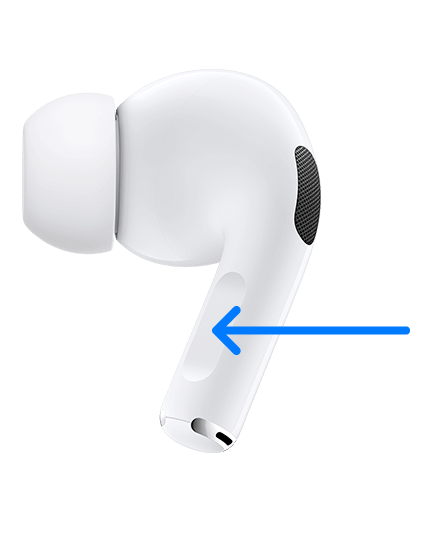
2. Keep holding the stem until you hear a chime.
3. Each chime signal states that you switch between noise control settings.
4. Leave the stem when Noise Cancellation is selected.
That’s all. With this guide, you can quickly turn on noise cancellation on AirPods gen 2 or gen 3. By enabling this option, you won’t be disturbed while listening to songs and podcasts. You will get a smooth listening experience with your AirPods. In case of any connectivity issue, the users can restart AirPods.
Frequently Asked Questions
You can turn on the noise canceling on AirPods Pro from your iPhone, iPad, Apple Watch, and Mac. For further details, you shall read the above section thoroughly.
You cannot enable noise cancellation on AirPods on Android.
To enable noise cancellation on AirPods Max, press the noise control button to switch between Noise Cancellation and Transparency Mode.
Yes, you can turn noise canceling off on AirPods Pro.