
The playlist is a collection of audio or video files and it can be played using the media player. iPhone supports creating playlists as long as you have enough storage. Transferring playlists isn’t simple from iPhone. However, for varied reasons, if you want to export playlists, iPhone lets you do it. Transferring or copying the playlists from iPhone requires iTunes on PC. With this, you can export your playlists and share them with others. If that seems useful, you should know how to transfer the playlist from iPhone to iTunes. The section guides you with the same. Make sure to have the latest version of iTunes installed on your PC and then proceed with the below procedure.
How to Transfer Playlist from iPhone to iTunes
There are two easy ways that you can use to transfer your playlists:
- By using PC
- By using third-party apps
Transfer Playlist from iPhone to iTunes using PC
1. Connect your iPhone to your PC and open iTunes on your computer.
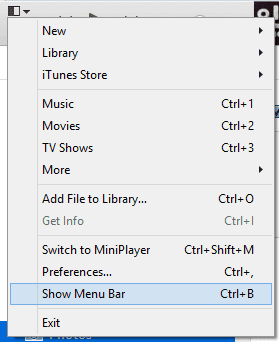
2. Click the iPhone icon at the top left corner of your screen and navigate to the Show Menu Bar. All the menus will appear on the top of your screen.
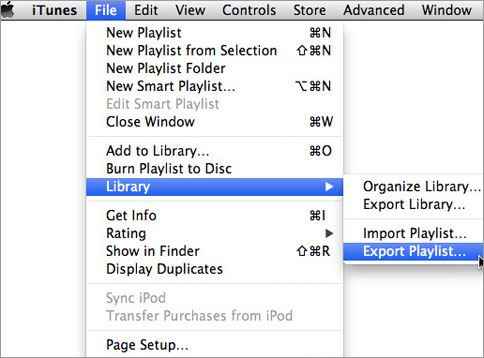
3. Go to File, select Library, and select Export library to save your playlist in text format.
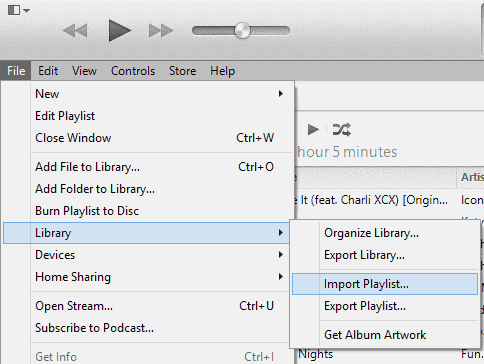
4. Again go to File and select the files that you saved in step 3. Select the import library option to transfer your playlist from iPhone to iTunes.
Related: How to Transfer Notes from iPhone to PC without iTunes
Transfer Playlist from iPhone to iTunes using Third-Party Apps
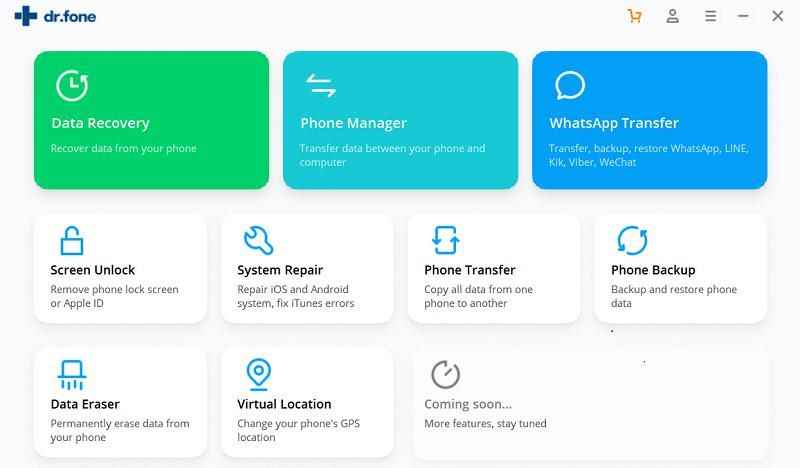
The easiest method to transfer your playlist is by using third-party applications. dr.fone- Phone Manager is one of the best applications to transfer your playlist without any complications. The steps to use this application is given below:
1. Install and open dr. fone – Phone Manager on your PC.
2. Connect your iPhone with your computer and choose Transfer in the main interface.
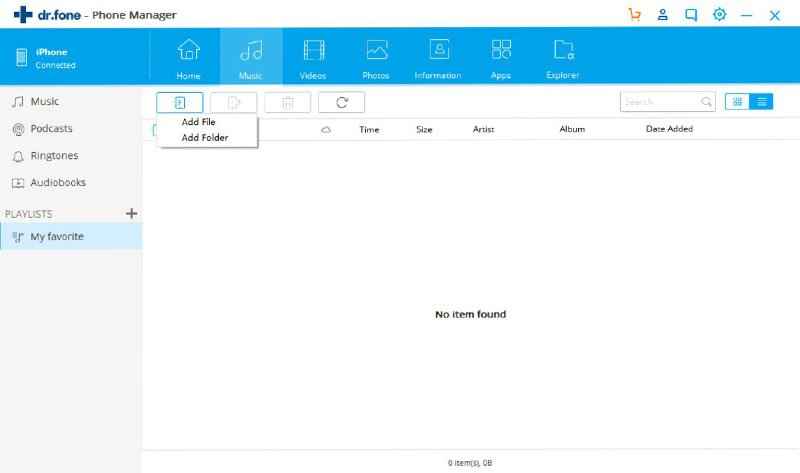
3. After your device is connected, go to the Music tab. All your playlists will appear on your screen. You can also add new songs and remove unwanted ones.
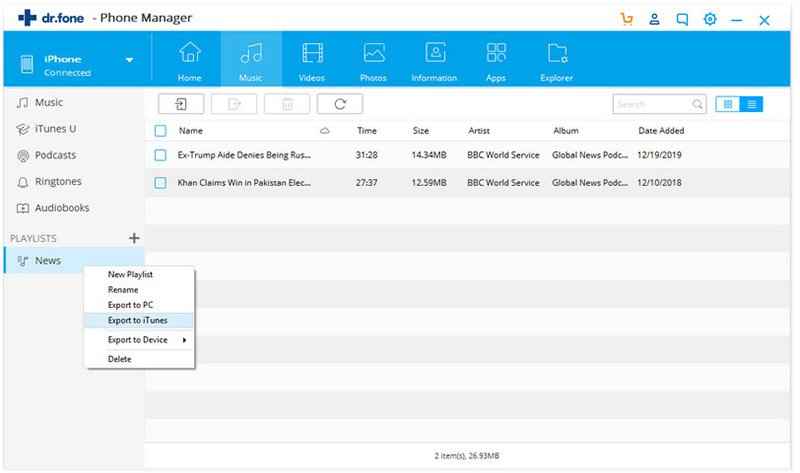
4. Select the playlists that you need and select the Export button and choose export to iTunes.
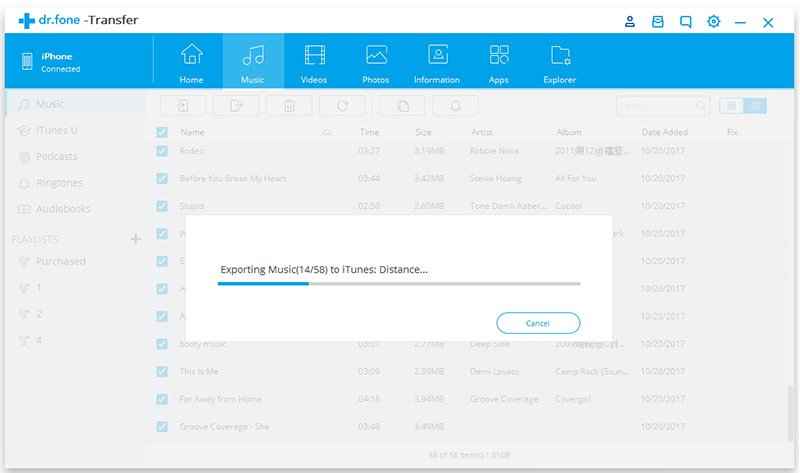
5. It will take a couple of minutes to transfer playlists from iPhone to iTunes.
Related: How to Transfer Photos from iPhone to Any Device Quickly
These are the methods that you can follow to transfer your playlist to iTunes from your iPhone. Hope that you have learned how to transfer playlists by using these simple steps. For more such useful article updates, you shall visit our blog.