
Apple iPad is designed to be a versatile tablet computer and is not just used for productive purposes. It has led the users to use it for learning, designing, gaming, entertainment, etc. While the iPad is portable and powerful, it is ideal to use it along with a PC or Mac. With this, you can perform lots of other tasks quickly. If you happen to reset your iPad or back up your files, you can transfer them from iPad to PC. Likewise, you can get back the files from your PC to the iPad after a reset. It is a simple process, and you can perform it using different ways. With no further delay, let’s walk through the steps on how to transfer files from PC to iPad.
How to Transfer Files from PC to iPad?
There is more than one way possible when it comes to transferring files from your PC to iPad.
- Finder
- iTunes
- iCloud Drive
- AirDrop
- Google Drive
- iCloud Photos
Transfer Files from PC to iPad using Finder
If you use Mac and iPad hand in hand, then use Finder to transfer the media files.
Note: The steps below work only with macOS 10.15 or higher. Others can use iTunes, and the steps are explained in the next section.
1.Use a USB cable and connect your iPad with macOS.
Optionally, you can set up Wi-Fi sync and connect them to the same Wi-Fi.
2. On the Finder of your Mac, choose your iPad.
3. Go to the top of the Finder window and select Files.
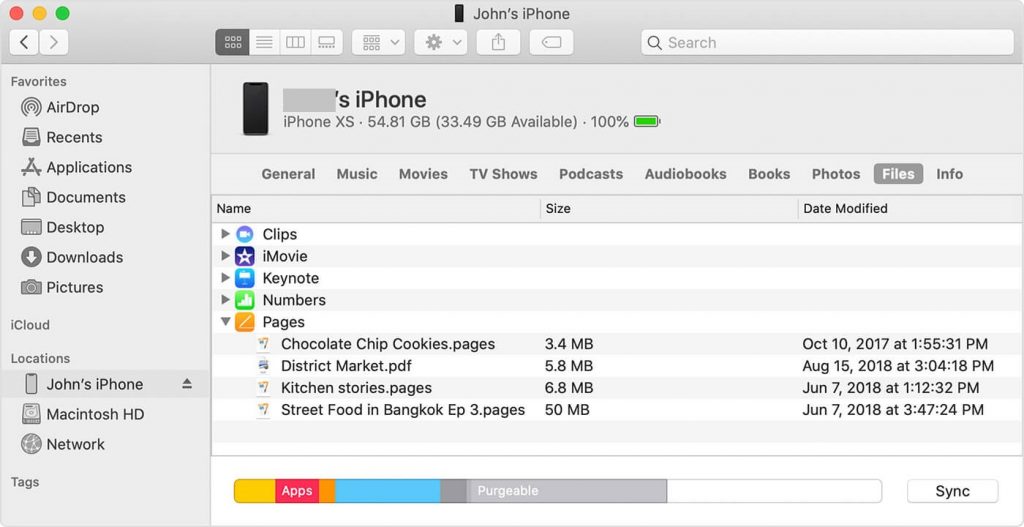
4. Further, choose Transfer from Mac to iPad.
5. Now, drag a file or multiple files to the folder of your iPad.
Transfer Files from PC to iPad using iTunes
Whether you have Windows or Mac PC with a lower version, iTunes helps you transfer files to the iPad.
1. Connect your iPad with Windows or Mac PC via a USB cable. You can choose Wi-Fi syncing feature as an alternative.
2. When the iTunes window opens up, navigate to click on the iPad button at the top-left.
3. Select the File Sharing option and choose an App to which you want to transfer the files.

4. Navigate to the bottom and click on the Add button.
5. With this, File Explorer or Finder will open up. Select the file and press Add.
6. Now, click on the Sync button at the bottom to transfer the files to the iPad.
7. When sync ends, select Done to get back to the main page of iTunes.
Transfer Files from PC to iPad using iCloud Drive
iCloud provides seamless support on iPhone, iPad, Mac, and PC. So, you can use this as a medium to transfer the files from PC to iPad. Make sure you follow the steps after downloading iCloud on the Windows PC.
1. Unlock the iPad and navigate to its Settings app.
2.Tap on your name and select iCloud to enable the iCloud Drive option.
3. Keep the files uploaded on your PC that you want to transfer to your iPad via iCloud Drive.
4. Go to Windows Settings to enable iCloud Drive.
5. Now, go to This PC and select the iCloud Drive on the left pane.
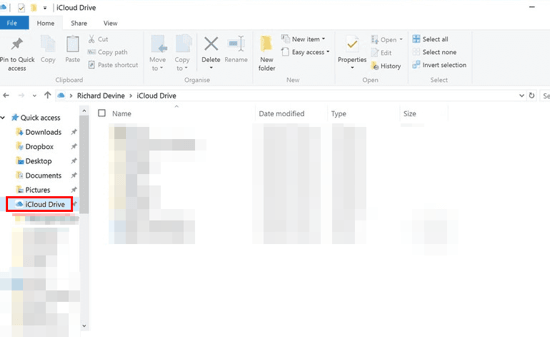
6. Drag and drop the preferred files to the iCloud Drive folder.
Related: How to Transfer Notes from iPhone to PC without iTunes
Try This Way!
If your PC doesn’t have iCloud installed, you can transfer files from the PC using iCloud.com.
1. Visit iCloud.com on your browser and sign in to your account.
2. Choose iCloud Drive and click on the Upload icon.
3. When the File Explorer or Finder opens up, click on a file to select it.
Note: To select all files, use Ctrl+A or Cmd+A on Windows and Mac, respectively. Press Ctrl or Cmd keys on Windows or Mac to select multiple files.
4. Select the Open button at the bottom. Wait for the uploading process to end.
5. After the upload, you can open the iPad’s Files app to select the Browse tab.
6. Choose iCloud Drive on the left panel and click on the Select icon.
7. Now, tap on the circle next to the file you want to transfer from the PC.
8. Tap on Move and choose On My iPad.
9. Choose a folder to save the files and press Move.
Transfer Files from PC to iPad using AirDrop
AirDrop is the most efficient option to transfer files from your PC to the iPad.
1. On your Mac PC, open the Finder app and select Go on the menu bar.
2. Navigate on the expanded menu options to click on AirDrop.
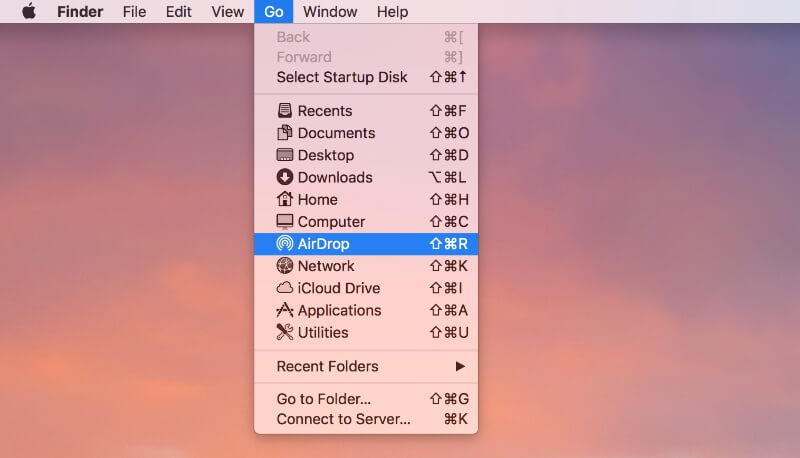
3. Go to the bottom and select Contacts Only or Everyone in the drop-down menu.
4. Launch the Files app on your iPad to select Browse.
5. Choose On My iPad and select the app where you want to transfer the files to.
6. Hover to the top and click on Select. Now, choose the files.
7. Click on the Share button and choose the AirDrop icon.
8. Make a tap on the contact, and the files will be transferred.
Transfer Files to iPad from PC using Google Drive
Google Drive is a cloud storage space, and you can use it to transfer files from the PC to your iPad.
1. Open your browser and visit https://drive.google.com on your PC.
2. Press the New button and select the File Upload or Folder option.
3. Select the folders or files to upload and transfer them to the iPad.
4. Open the Apple Store on your iPad, and download Google Drive app.
5. Enter the login details to sign in to your account to access the transferred files on your iPad
Transfer Files to iPad using Email
The next possible way to transfer files to the iPad can be done using email. You can send the files as an attachment from the PC and access them from the iPad.
1. Compose a new email on your PC.
2. Select the Attachment icon to add the files you want to transfer to. Save it as a draft.
3. Now, launch Google Email on iPad and log in with the same email account.
4. Open the draft and access the files on your iPad.
Transfer Files to iPad using iCloud Photos
You can use your iCloud Photos to transfer the files from your PC to the iPad. The steps below will help you with it.
1. On your iPad, launch Settings and tap on your name.
2. Choose iCloud and select the Photos.
3. Toggle the slider next to the iCloud Photos to turn it On.
4. On your PC, launch iCloud and sign in to your account.
5. Enable Photos and choose iCloud Photo Library.
6. Choose Upload new photos and videos from my PC.
7. Select the location and click Done. You can now access the same on your iPad.
You might also read: How to Transfer Music from Android to iPhone
That was all the possible methods to transfer your files to an iPad from a PC. For more such useful tips and tricks, visit our blog.