
The MacBook is always a powerful computer. With MacBook Pro 13-inch and 15-inch, you will get Touch Bar access. It comes integrated with many macOS apps to give you quick shortcuts for the tasks that you often do based on your current app and activity. On the Touch Bar, you see a small strip on the top of the window, showing a light-up panel with different options based on what you do. And on the right side, you get a stationary Control Strip which offers quick access to system features. Further, you can customize the Touch Bar on the MacBook Pro. Just as you take a screenshot on an iPad/iPhone, you can take screenshots on Mac quickly using Touch Bar on MacBook Pro. You can use the keyboard shortcuts and screenshot button on Touch Bar to take screenshots. Find out how to take Touch Bar Screenshots on MacBook Pro.
How to Take a Screenshot on MacBook Pro using Touch Bar and Save It on the Desktop
To capture a screenshot using Touch Bar, press and hold down Shift + Command + 6 simultaneously. The screenshot gets saved on the desktop automatically.
If you have synced Desktop and Documents in iCloud Drive, you can access the screenshot on all the devices through iCloud Drive. You can just drag the screenshot to the iCloud Drive app from the Desktop.
How to Take a Screenshot using Touch Bar and Send It To your Clipboard
If you want to take a Touch Bar screenshot and send it to your clipboard, you have to press and hold down the Control + Shift + Command + 6 simultaneously, and the screenshot will be saved to your clipboard.
If you have macOS Sierra and iOS 10, you can copy and paste the screenshot on any device connected to your Apple ID.
How to Change the Keyboard Shortcut to Take the Touch Bar Screenshot
When you copy the Touch Bar screenshot to your clipboard, the keyboard shortcut takes a long time. So, if you want to copy it quickly, you can change the keys. But make sure the keys are not used for any other keyboard shortcut.
1. Tap on the Apple menu and choose the System Preferences option.
2. Under that, select Keyboard and tap the Shortcuts tab from the top.
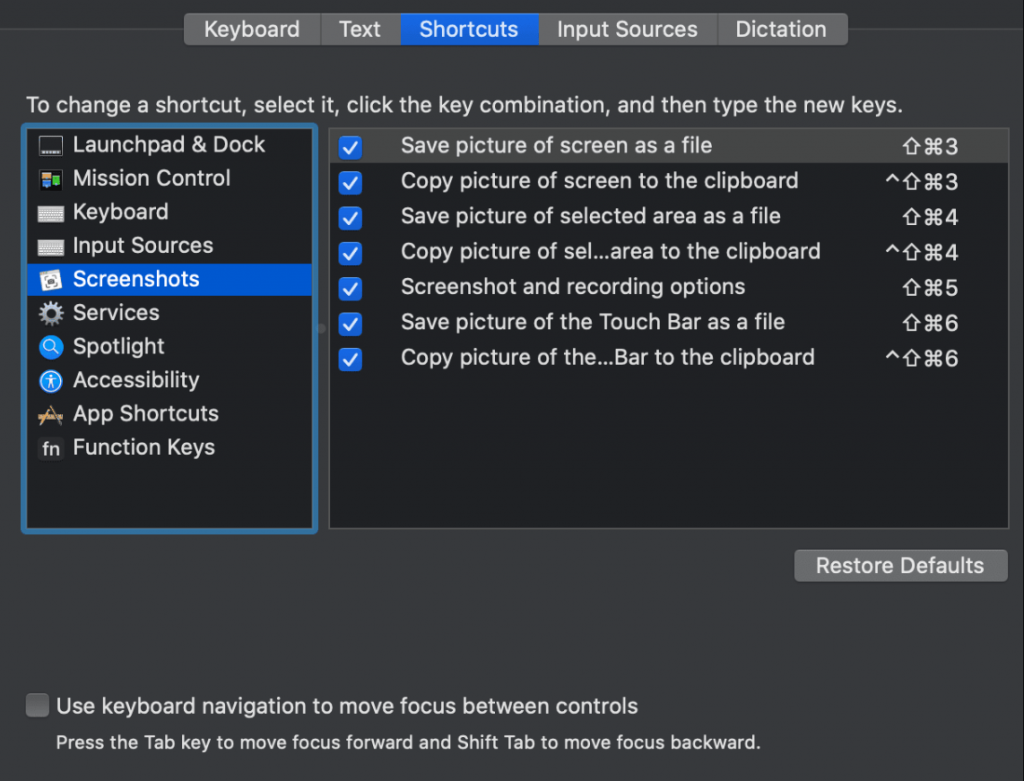
3. Next, click on the Screenshots on the left sidebar.
Note: You can even learn to Take a Screenshot on Apple TV in 2 different ways.
4. Now, choose the Action for which you want to change the shortcut.
5. Tap the Current Shortcut, which will turn into a text field.
6. Enter the Keyboard Shortcut and tap on the Red Close Window from the upper left corner.
7. Now, you can use the new shortcut to copy the screenshot to the clipboard.
How to Add a Screenshot Button to the Touch Bar
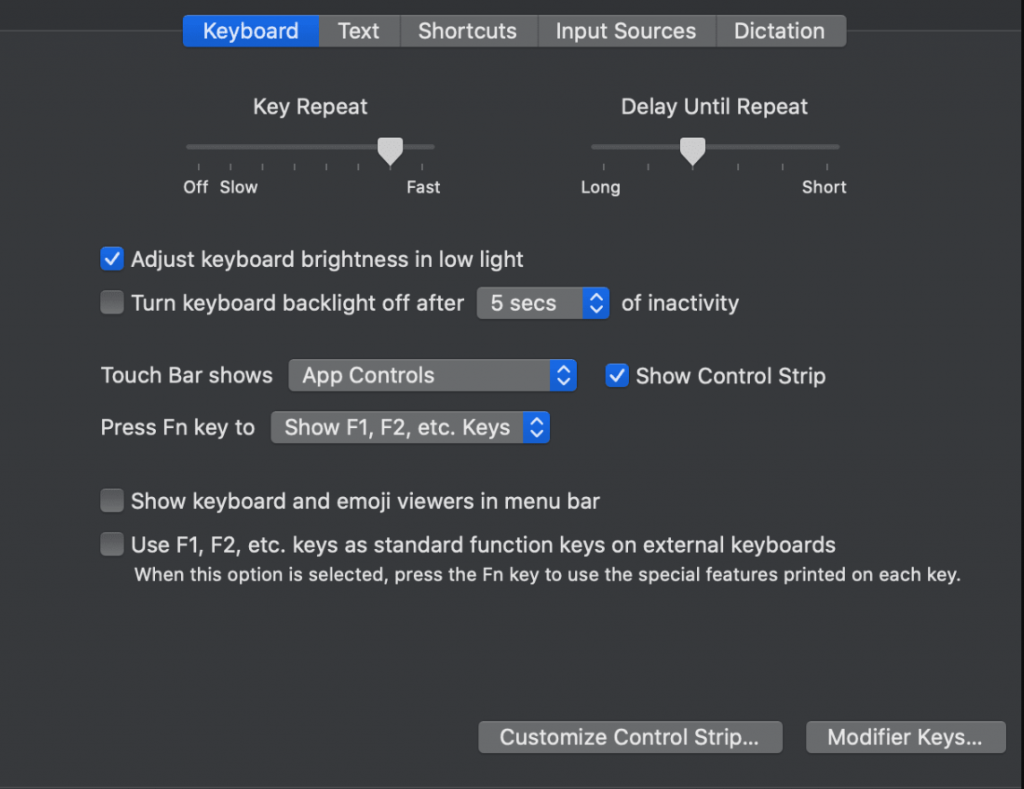
You can make a button on the Touch Bar to create screenshots of your Mac screen and Touch Bar. To create a screenshot button navigate to Apple menu >> System Preferences >> Keyboard >> Customize Control Strip. And then, drag and drop the screenshot button where you want to place it on the Touch Bar.
Once you added the screenshot button on the Touch Bar, click on the button and tap Save To, and choose where you want to save the screenshot. You will get the option to save the screenshot on your desktop, documents, and the clipboard, or you can open the screenshot in the Preview, Mail, or Messages app.
Further, you must select the type of screenshot you want to create. If you select Portion, you can select the part using the mouse to take a screenshot. Selecting the Window option will allow you to take screenshots of the whole app. Finally, if you choose the Entire Screen option, you can take screenshots of the entire screen.
These are the ways that you can use to take Touch Bar screenshots. And remember, Touch Bar changes the functions on the MacBook Pro depending on the app in the foreground.
Frequently Asked Questions
Go to Apple menu >> System Preferences >> Keyboard >> Customize Control Strip >> drag the button to the place where you want to keep it.
You can take screenshots on a MacBook in different ways. You can press Command + Shift + 4 or drag your mouse over the area to take a screenshot.
As of now, you can find Touch Bar only on the 13- and 15-inch MacBook Pros. We can expect an OLED panel for every Mac keyboard, laptop, and desktop in the future.