
Apple’s iPad is one of the most famous tablet computers used by millions. It features a multi-touch screen, and the newer models feature Apple Pencil. iPad is capable of shooting videos and photos, playing music and games, etc. It is an all-purpose tablet that can be used for business, productivity, education, and other needs. Nevertheless, it fails to perform the essential functions. It comes with lots of built-in useful functionalities like capturing the screen. There may be times you have comes across something interesting, and you wanted to share it with others. In that case, the screenshot feature comes as a rescue. Taking a screenshot is the easiest way to record the screen info as an image. If you are relatively a new iPad user and looking for guidelines on how to take a screenshot on an iPad, you are at the right spot.
How to Take a Screenshot on iPad?
You will find more than one way to screenshot on iPad in the upcoming section. The procedure to take a screenshot on iPad is the same for the entire line up including the iPad Pro, iPad Air, and iPad Mini.
Take a Screenshot on iPad without Home Button
The latest-generation iPads don’t feature the Home button. If your iPad has no Home button and you wonder how to capture the screen, we have the workaround.
1. Press the Power and Volume up button simultaneously.
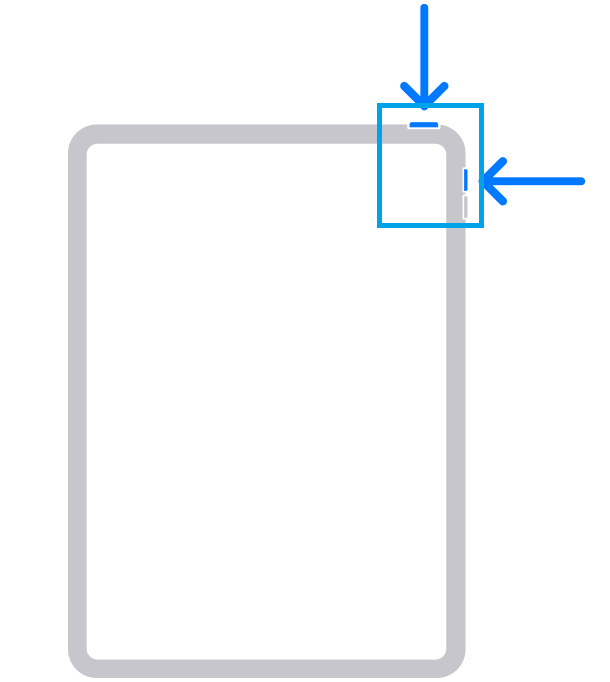
2. Gently release the buttons once you see a flash on the screen.
3. After capturing the screenshot, the iPad displays a thumbnail on the bottom-left corner of your iPad.
4. Before it gets disappears, click on the thumbnail to open it if you want to perform any edits instantly. Swipe left to dismiss it.
Related: How to Sync Contacts from iPhone to iPad in 3 Easy Ways
Take a Screenshot on iPad with Home Button
If your iPad has a home button, you could follow these steps to capture a screenshot.
1. Press the Top button and Home button together.
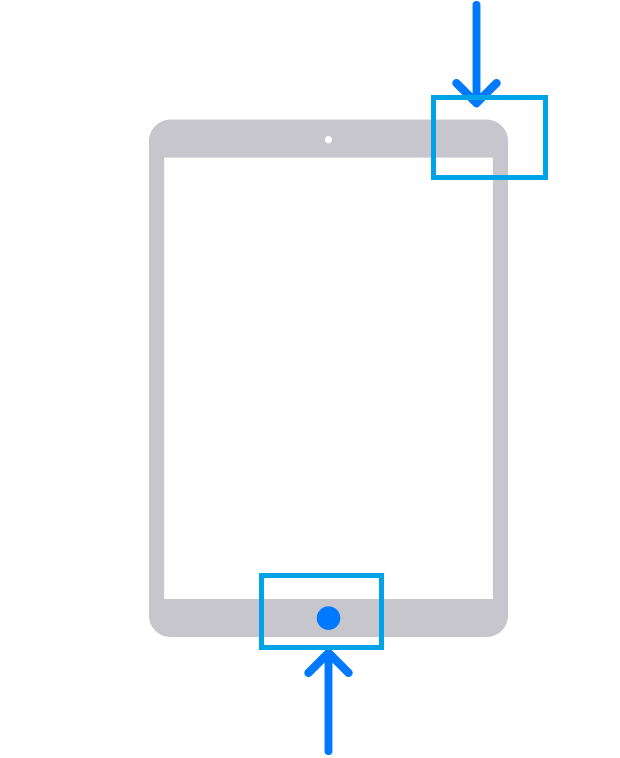
2. When the screen gets captured, release your fingers from both buttons.
3. Click on the thumbnail that appears at the lower-left corner of the screen to open it. Else, swipe left to dismiss it.
Using AssistiveTouch
If you find difficulty capturing the iPad screen using button combinations, you shall use the AssistiveTouch feature. It is an on-screen menu with which you can perform lots of actions without the press of the buttons.
Pre-Requisite
To enable AssistiveTouch on your iPad,
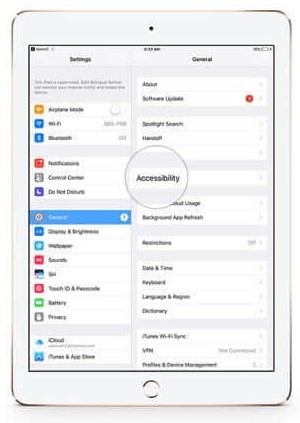
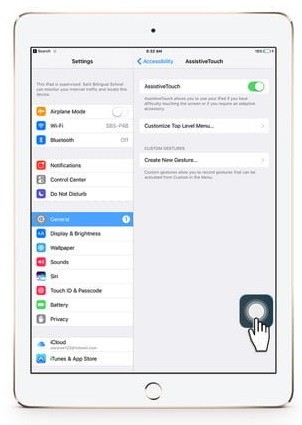
- 1. Go to iPad Settings > select General > to choose Accessibility.
- If you have iPadOS 14, go to Settings > Accessibility > Touch.
2. Select the AssistiveTouch option to proceed.
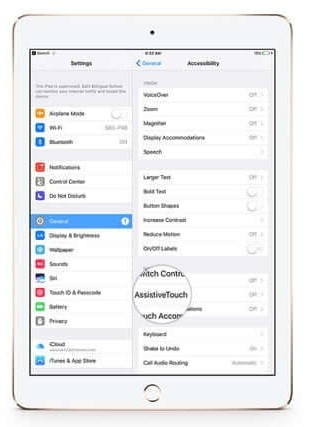
3. Toggle the slider next to AssistiveTouch to turn it on.

Steps to Take A Screenshot on iPad using AssistiveTouch
1. On your iPad, tap on the AssistiveTouch menu button.
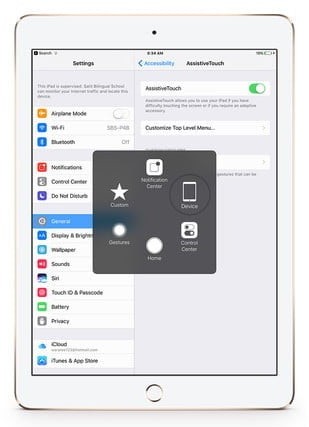
2. Select the Device on the following screen.
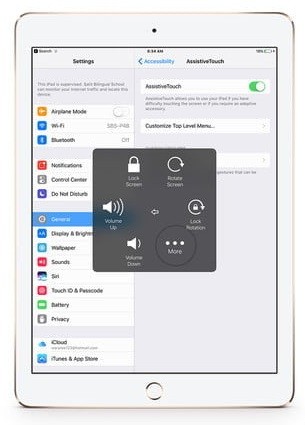
3. Navigate to click on the More option.
3. Choose the Screenshot option, and your iPad screen will flash with a shutter sound.
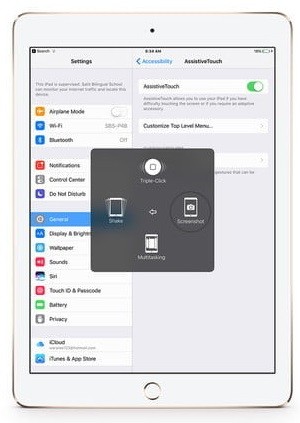
Note: Shutter sound occurs if your iPad isn’t in Silent mode.
4. When the screen gets captured, it gets saved to your Photos app. You can access it over there.
Using Apple Pencil
You can capture your iPad screen with your Apple Pencil in no time. The steps below will be really effective for those graphic designers or artists.
1. Swipe your stylus from the bottom corner of either side towards the middle of the screen.
2. Screenshot editing tools will appear, and you can take a screenshot without leaving your Apple Pencil.
Important! All your screenshots will be stored on the Photos app of your iPad. You can access them by navigating to Photos > Albums > Screenshot.
Also see How to Change iPad Name Easily & Instantly
These are all the possible ways in which you can capture your iPad screen. Choose the method that is effective for you. For more such useful articles, visit our blog.