
Sometimes you will want to record the screen on your Mac, and taking a screenshot may not cut it. If you are looking for something more dynamic, like screen recording a video, you have come to the right place. Screen recording is a useful tool to have at your disposal. You might want to record your screen for different reasons. It could be recording a zoom meeting to your gameplay or anything more. With this, you don’t have to miss out on anything at any time later. Whatever the reason might be, the need to record the screen is the same. The article discusses how to screen record on Mac.
How to Screen Record on Mac
There are different techniques in which you can record your macOS screen. Take a look at the procedure for each method in brief.
Screen Record MacBook using Screenshot Bar
If you are on Mojave, Catalina, or newer versions of the Mac OS, you can use the in-built Screenshot function as it has a user-friendly screen recording option.
1. Press Command (⌘) + Shift + 5 on the keyboard to open the Screenshot control bar.

2. You can choose to Record the Entire Screen or Record only a Selected Portion. If you choose the Selected Portion, a box will pop up to drag and resize the recording window.
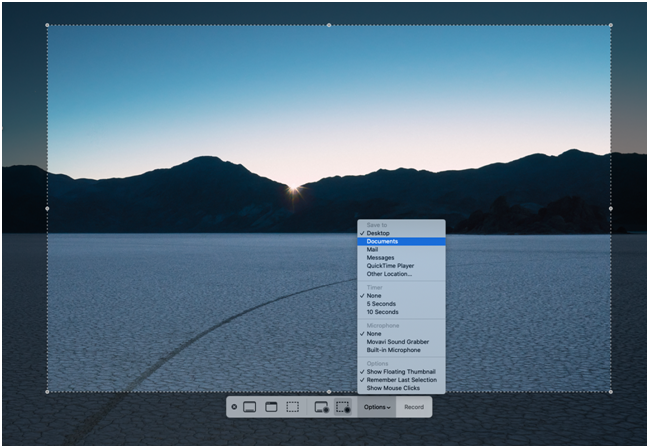
3. Click the Record button to start the recording. To record the entire screen, clicking anywhere on the screen will do the same.

4. Press Command (⌘) + Shift + Esc on the keyboard to stop recording. Or, Press Press Command (⌘) + Shift + 5 for the screenshot bar, and you can click the Stop Button.
Screen Record MacBook Pro/Air using Quicktime Player
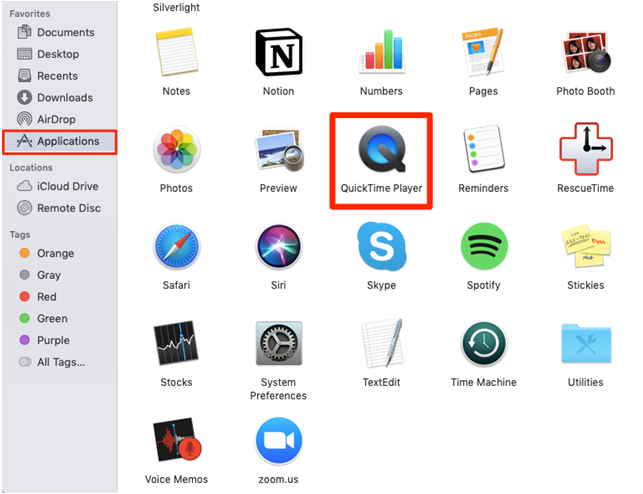
1. Open the Finder in your dock.

2. Click on the Applications tab in the left side menu.
3. Launch the QuickTime Player by double-clicking on it
.
4. Click on the File menu on the top of the screen in the Menu Bar. Then, select New Screen Recording.
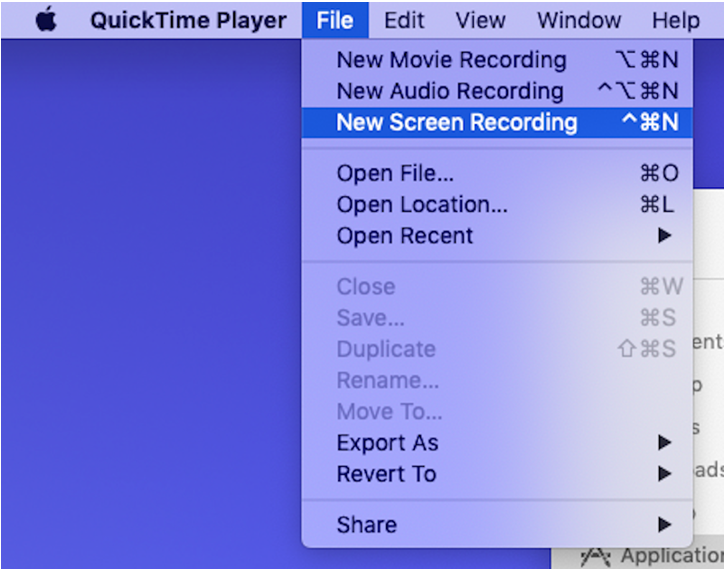
5. If you want to record audio on your Mac, select the Audio Source from the drop-down menu.

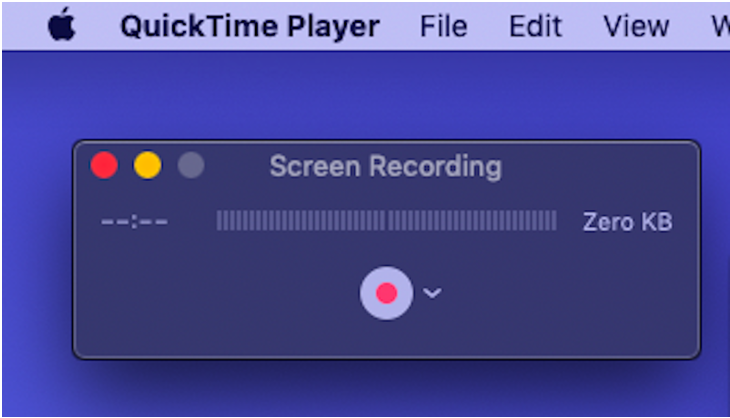
6. Click the Recording Button to Start Recording. Click anywhere on the screen to record everything. Or select the portion you want to record by clicking and dragging a box around it and then hitting Record.
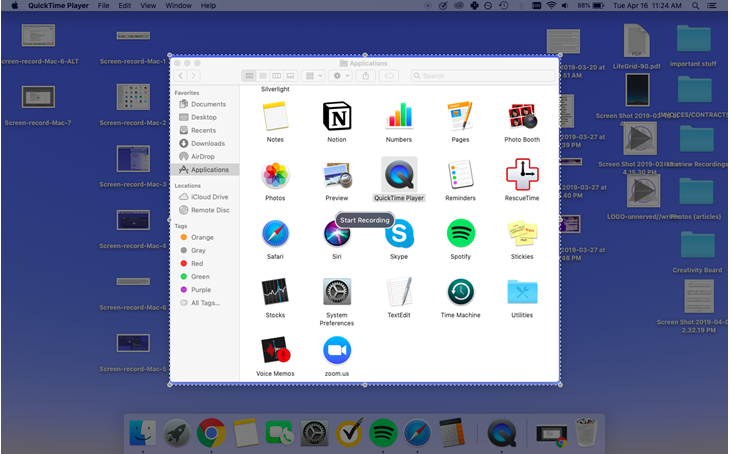
9. Click on the Small recording icon in the toolbar, at the top of the screen to end the Recording. Or press Command (⌘) + Shift + Esc.

This way you can screen record on Mac with audio using the QuickTime Player app.
Related: How to Connect Bose Headphones to Mac | Audio & Music
Screen Record Macbook Air/Pro with Third-Party App
Screencast-O-Matic
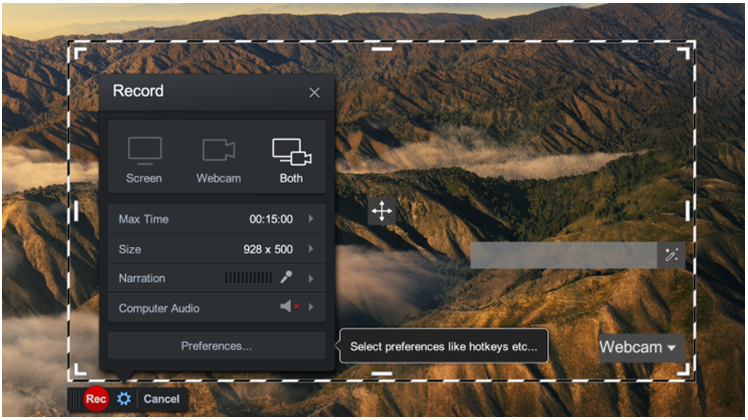
Screencast-O-Matic is a free recording app that is available for all platforms, especially Mac
1. Download the App from its official website.
2. Open the app and set your preferences on the dialog box. It offers more flexibility to record your webcam along with your screen.
3. Click on the Record Button to start recording.
4. Once you are done, hit the Stop Button or hit Command (⌘) + Shift + Esc to end the recording.
Bonus: How to Stop Screen Recording on Mac
If you don’t want to record your macOS screen any longer, you should stop recording it.
- To stop the screen recording, you shall click on the Stop button. Alternatively, press the Command+Control+Esc key.
- You can stop the screen recording on the QuickTime Player. Go ahead to click the Stop button. Otherwise, press the Esc key and the Stop button.
To Conclude
In this article, we have discussed all the ways with which you can record your screen. You can use the inbuilt options, which work just fine, or opt for a dedicated third-party app if you want more control over your recordings. For more interesting guides for your Apple devices, visit our blog.