
Parents need to pay more attention to their children’s online activities. There are many chances for them to get addicted while using smartphones, like social media, games, and more. In addition to this, there are unwanted things available online. When your kids have to access everything, it will impact kids’ mental health more. Also, limiting screen time not just applies to kids but also to everyone. Having this in mind, Apple had released screen time on its iOS and iPadOS. With this screen time feature, you can see how much time you and your kids are spending on your device, and based on that, you can limit screen time on your iPhone and iPad. Additionally, you can set apps and website limits using the screen time feature. With that note, you shall learn how to set screen time on an iPad from this article.
How to Enable Screen Time on iPad
1. Go to Settings on your iPad and select the Screen Time option.
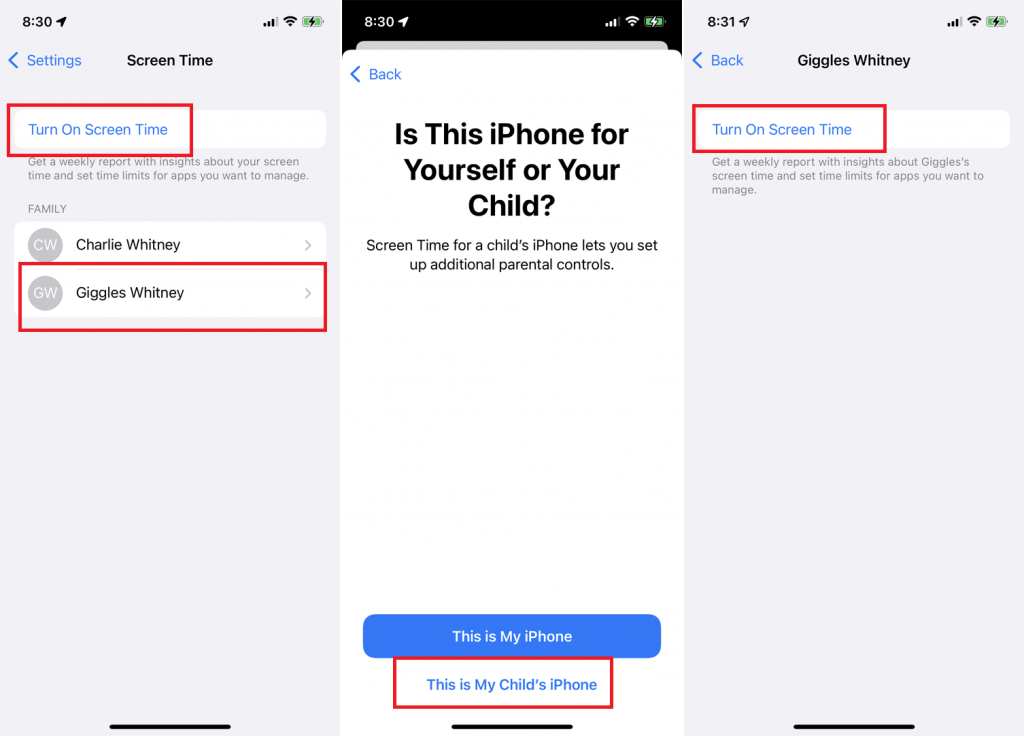
2. Under that tap, Turn on Screen Time.
3. Then, read the details and click on the Continue button.
4. Further, choose This is My [device], or This is My Child’s [device].
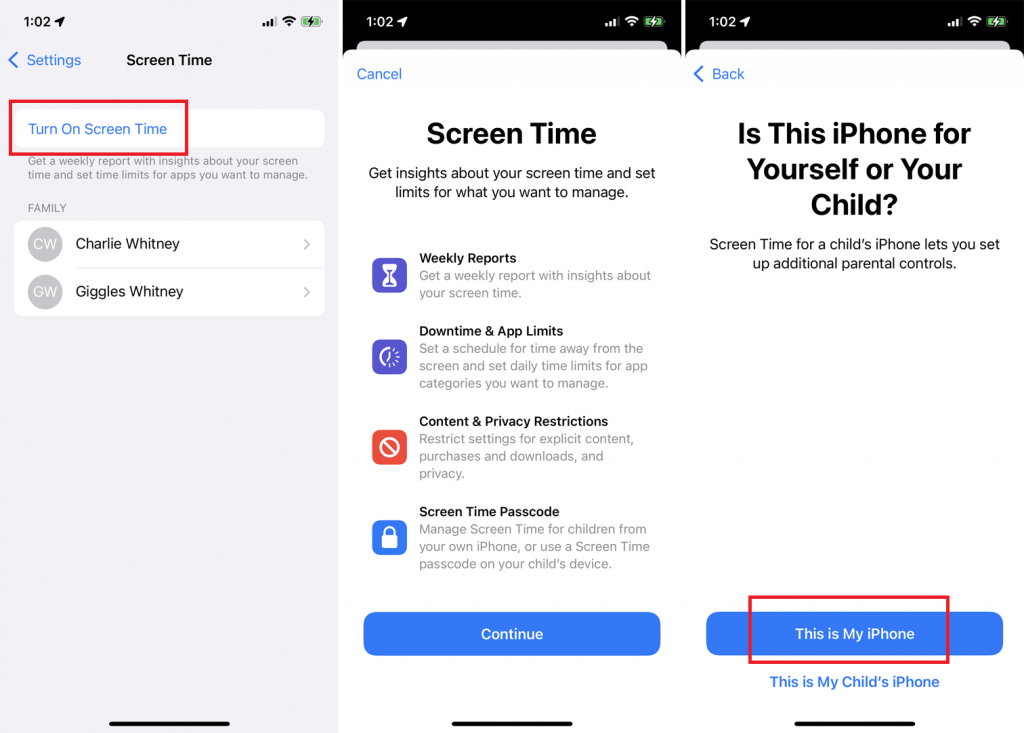
5. Now, you will see a report that shows how you use your device, apps, and website.
How to Set Screen Time Passcode
By creating a screen time passcode, only you can extend the time or make changes. So, always remember to set a passcode different from the one you use to unlock your device.
1. Go to Settings and Screen Time. (If you want to set a passcode for your child, then tap your child’s name).
2. Choose Use Screen Time Passcode.

3. Now, type your passcode twice, and the passcode will be set.
Related: How to Turn On/Turn Off Two-Factor Authentication on iPad
Other Screen Time Limitations Settings on iPad
To Monitor Multiple Devices
Navigate to Settings >> Screen Time >> Turn on the switch next to Share Across Devices.
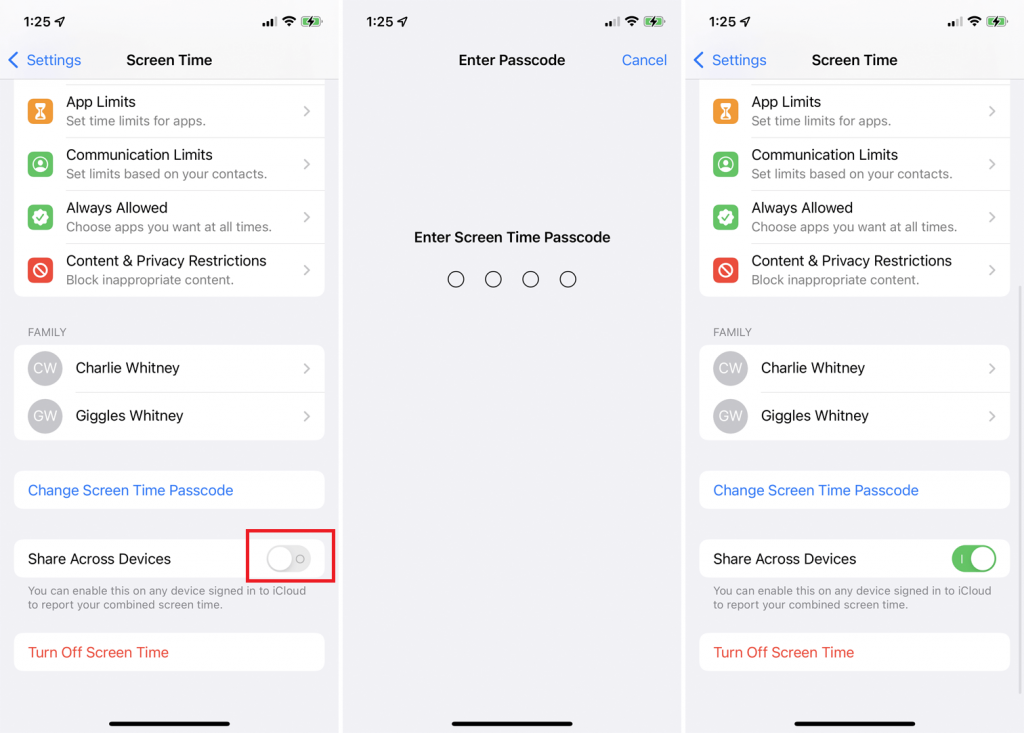
If you have more than one Apple device and want to see the screen time report on all the devices, you should enable two-factor authentication. If not, you can use the passcode to share the information on all the devices.
To Set Downtime Hours
If you enable downtime, only the phone calls and apps that you allow will be available. You can set a particular time to use the apps in the Downtime entry. It applies to all the screen time enabled devices, and you will get reminder five minutes before it starts.
1. Under screen time, tap on the Downtime option.
2. Set the time in From and To to set the time limits for all days.
3. If you tap Customize Days, you set different times for each day of the week.
4. If you want to block all apps and activity, toggle the switch next to Block at Downtime.

5. To activate the Downtime immediately, tap Turn On Downtime Until Schedule link.
To Set App and Website Limits
1. Go to Settings and Screen Time.
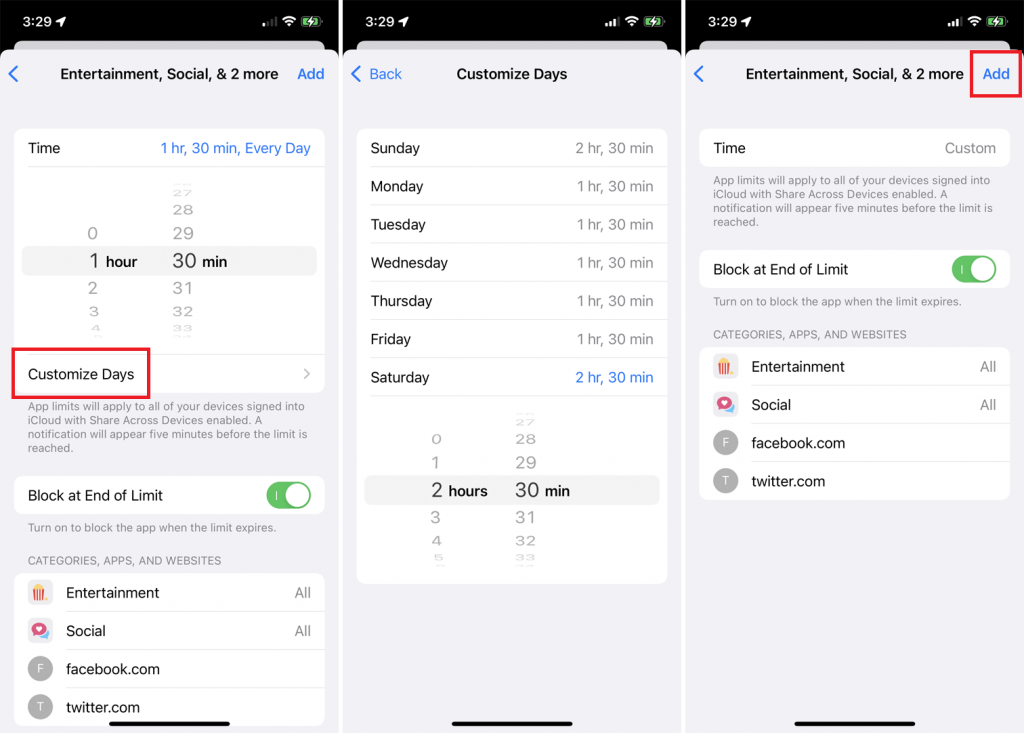
2. Tap App Limits and choose Add Limit.
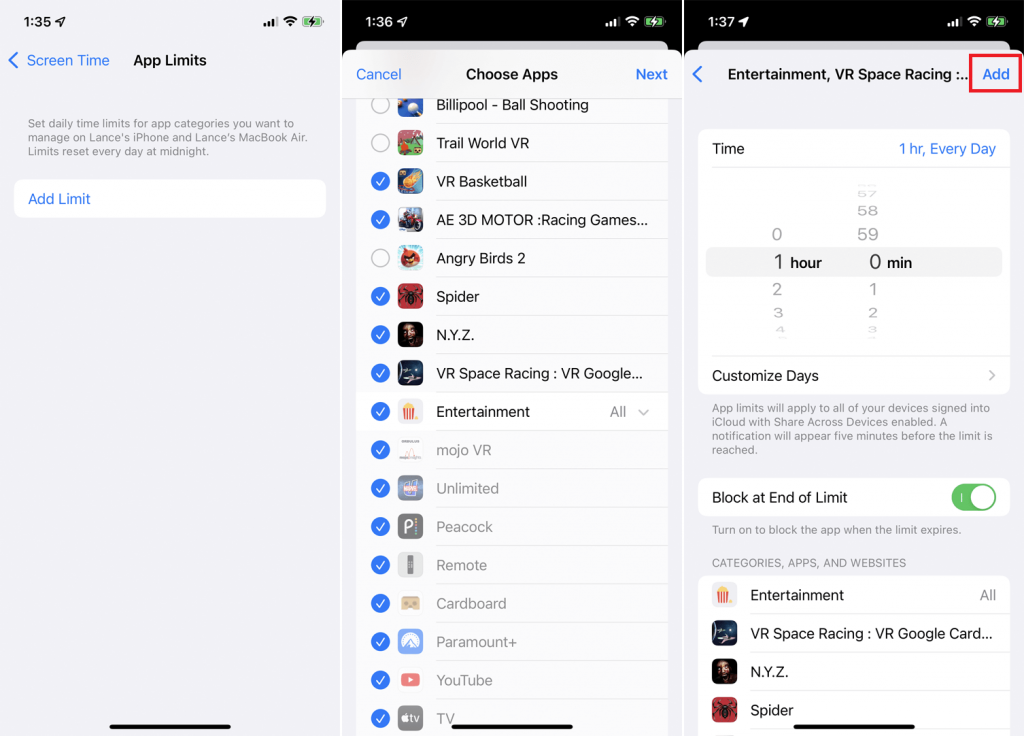
3. Now, select a category and individual apps or select All Apps and Categories to set the time limit for all the apps.
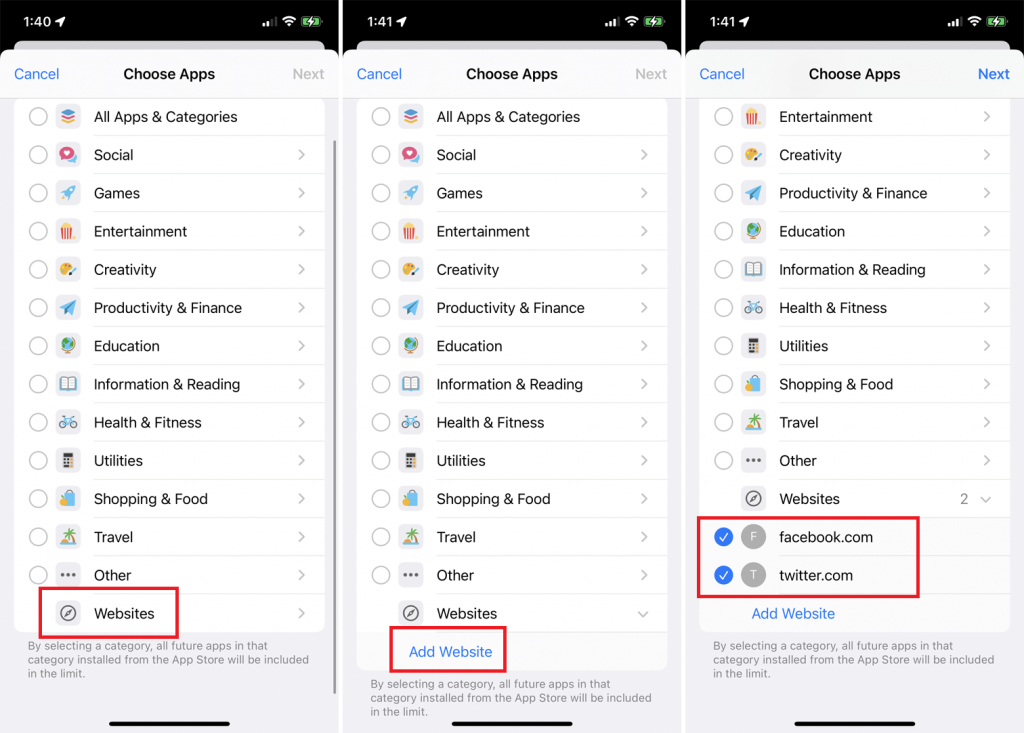
4. If you want to set a time limit for websites, tap Websites from the bottom of the screen.
5. Under that, tap Add Website and enter the website URL to which you want to set a time limit.
6. Once done, click on Next and set the time to use the apps.
7. If you want to set a different time for each day, tap Customize Days to set the time.
8. Finally, tap Add to complete the settings.
To Set Communication Limits
You can allow or block communication from settings. It includes incoming and outgoing phone calls, FaceTime calls and messages, and from iCloud contacts too.
1. From the Screen Time screen, choose the Communication Limits option.
2. Now, select During Screen Time and select who has the authority to communicate when Screen Time is activated.
3. By tapping During Downtime, you can select a particular contact to communicate during downtime.
4. If you want to add specific people, tap Specific Contacts and choose Add Contacts.

To Allow Certain Apps
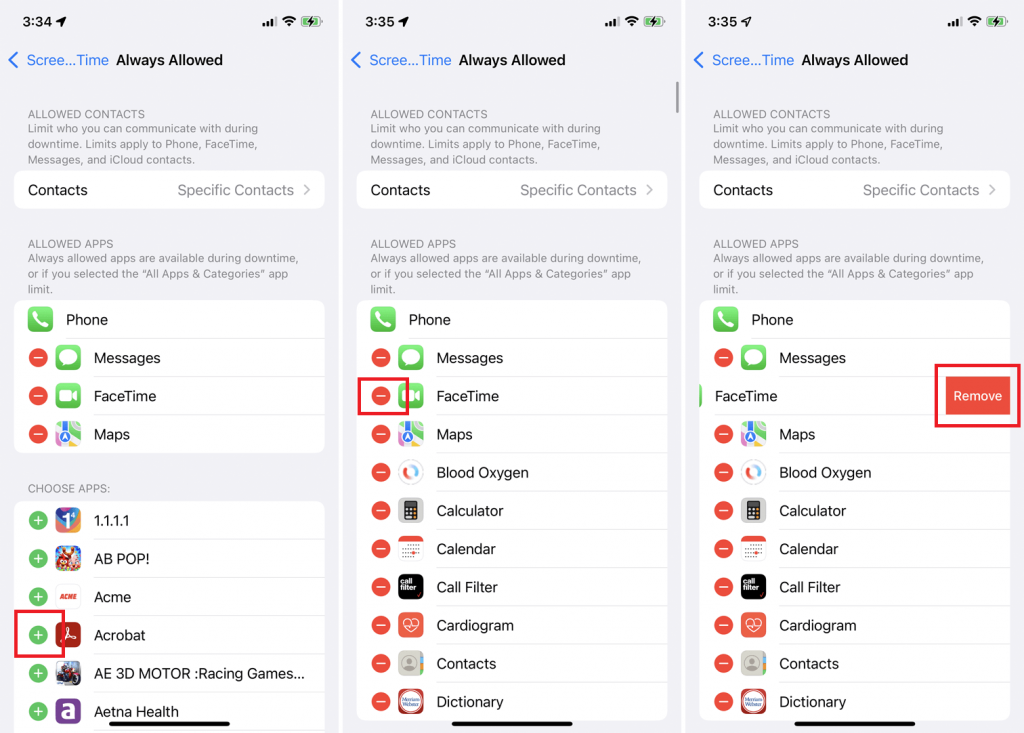
If you want to use certain apps always,
1. Go to the Screen Time menu and select the Always Allowed option.
2. Tap + sign to add the app, and to remove, tap the – sign and select Remove.
To Set Content and Privacy Restrictions
You can block inappropriate content and limit iTunes and App Store purchases restrictions.
1. On the Screen Time screen, tap Content & Privacy Restrictions.
2. Turn on the switch next to Content & Privacy Restrictions.
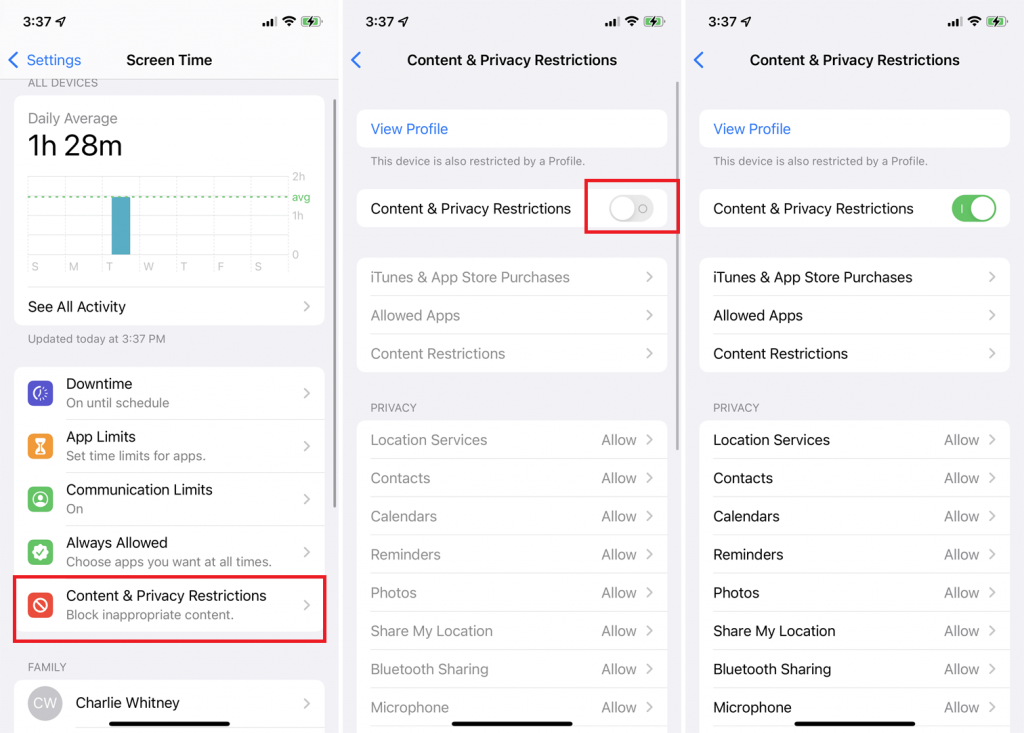
3. Further, tap iTunes & App Store Purchases to set content allowances for iTunes Store and App Store purchases, app use, content ratings, and so on.
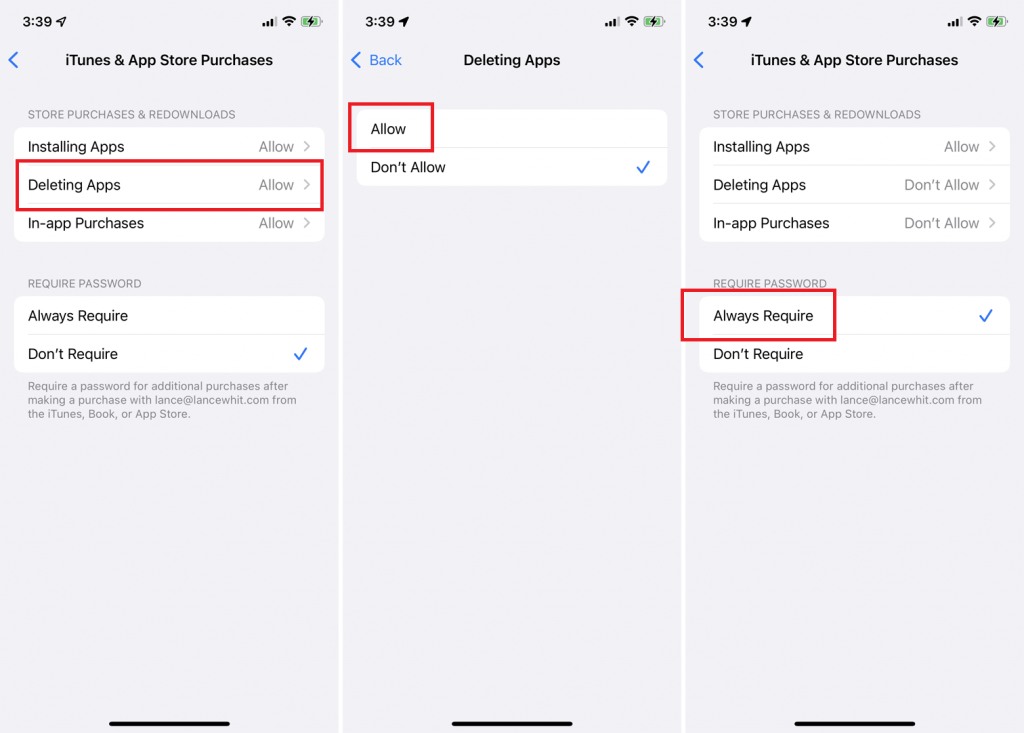
4. You can also set Passcode, which is required before changing settings.
5. If you want to enable or disable particular apps, select Allowed Apps from the Content & Privacy Restrictions screen.
6. If you want to restrict or allow the content from App Store and other sources, choose Content Restrictions and select which you want to allow or block.
7. To limit data sharing from particular apps, tap Privacy Section in Content & Privacy Restrictions and select each entry to enable and disable.
8. Once you set the limitations, approve those changes in Allow Changes section. You can choose each limitation and then allow or disallow it.

How To Limit Screen Time for a Child on iPad
You can easily set screen time limitations for your child’s iPad.
1. Turn on Screen Time and tap Continue on your child’s iPad.
2. Next, select This is My Child’s iPad.
3. The Screen Time screen will now display the other family members.
4. From there, select your Child’s name, whom you want to set screen time, and select Turn on Screen Time.
5. Further, set up Downtime limits, App Limits, and Content & Privacy Limitations.
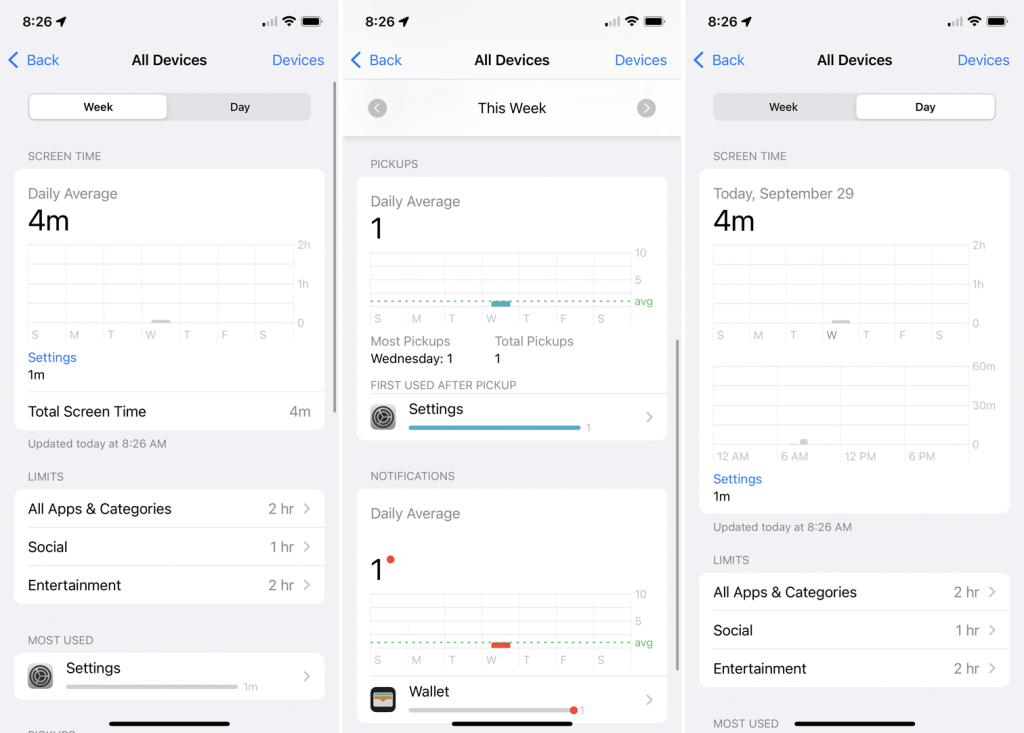
To Monitor App Usage
If you want to see how much time your child spends using particular apps, you can see them directly from the Screen Time main screen. It will give you a detailed report of time spent on each category and each app for a week and for a particular day.
That’s was about limiting screen time on the iPad. It is a most useful feature to monitor your child’s activities when they spend their time online. We hope this section helped you know how to limit screen time on the iPad. For more updated content, visit our blog.