
Apple AirPods, wireless earbuds from Apple deliver rich and high-quality sound. With the Apple H1 headphone chip, AirPods offers a stable wireless connection. It has Siri support, and you can ask for assistance anytime without reaching your iPhone. Apple assures AirPods will deliver five hours of listening time and three hours of talk time upon charging it for 15 minutes. The earbuds are easy to set up, and you can connect to all of the Apple devices. AirPods can be connected to macOS for an unexceptional listening experience. Upon connecting AirPods to Mac, you can handle phone calls, use Siri, and more in addition to listening to music. Pairing it with macOS is easy, which in turn saves the battery of your PC. To get all these benefits, you should know how to connect AirPods to MacBook. The same is explained here in this section.
How To Connect Airpods To MacBook
There are two different ways in which you can connect your AirPods to the Macbook. i.e., you can connect the AirPods not connected to iPhone and those connected to iPhone to your Mac.
Connect AirPods to MacBook Pro – Not Connected to iPhone
If you have brand new AirPods or you haven’t connected them to your iPhone, the below steps are all you should follow to connect to MacBook Pro.
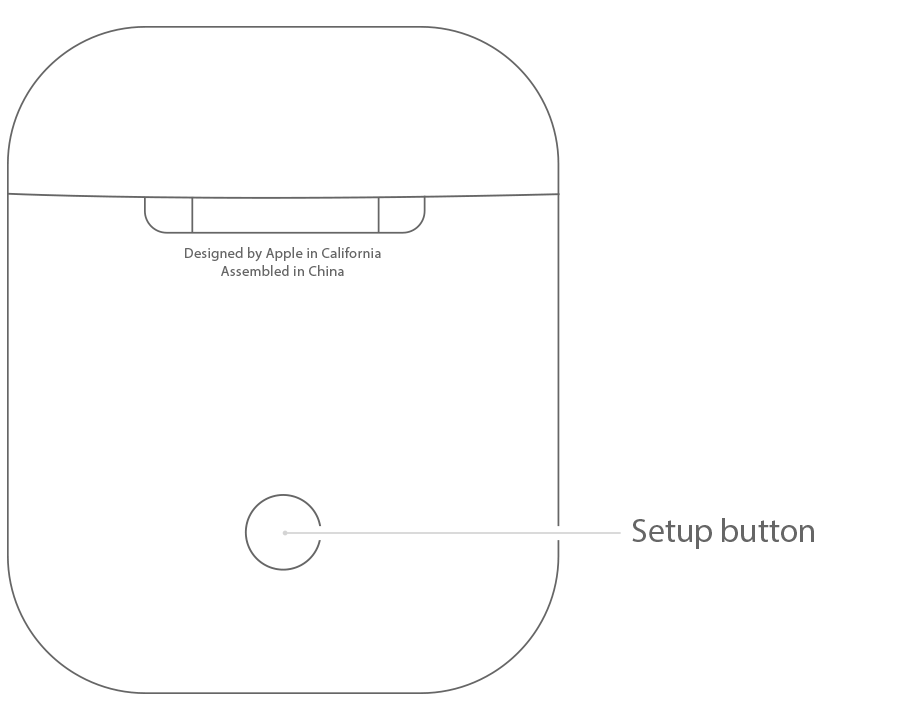
1. Open the lid and let the AirPods stay on its charging case. If you have AirPods Max, remove it from the Smart Case.
2. Now, look for the Pairing or Set up button on the back of the case to press and hold it. On AirPods Mac, press the noise control button till the status LED flashes white.
3. On the MacBook, click on the Apple menu and choose System Preferences.
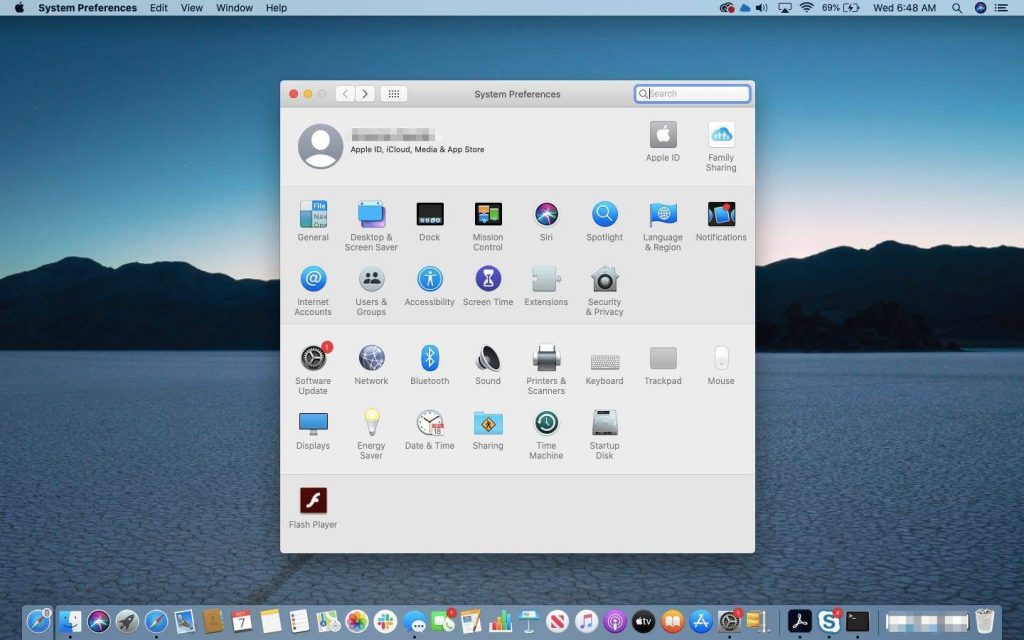
4. Select Bluetooth to proceed further.
5. Choose your AirPods and tap on the Connect button.

6. If the connection got established, AirPods is ready to use will appear at the top of the Devices list.
- Note: You can begin with “Hey Siri” to use AirPods over voice assistance on Mac.
- When prompted to improve Siri and Dictation, you should select Share audio recordings to store the audio or choose Not Now.
- Tip: If you find any issue like AirPods not connecting to MacBook, you shall try the below fixes one by one.
- Update macOS to the latest version, or macOS Sierra (1st gen AirPods), or macOS 10.14.4 or later (2nd gen AirPods)
- If AirPods isn’t connecting, remove the AirPods from the list of connected Bluetooth devices by selecting the ‘X ‘ icon. Now try pairing it again.
- Try resetting AirPods when nothing works. For this, you should press and hold the Pairing button.
Related: How to Connect AirPods To Apple TV: 2 Easy Methods Explained
Connect AirPods to Mac – With iPhone Already Connected
If you have previously connected your AirPods to the iPhone, the headphones will automatically connect to Mac. However, it works if you have logged in to the same Apple ID as that of your iPhone on Mac.
1. Start by opening your AirPods charging case.
2. Click on the Volume icon on the menu bar on your macOS.
3. Choose your AirPods under the Output Device section to connect them to Mac.
- Note: If the AirPods connection failed, you should do the below fixes.
- It is important to use the same Apple ID as that of your iPhone.
- Check Handoff is turned off under System Preferences > General > check in the box of Allow Handoff between this Mac and your iCloud devices.
- When the volume icon isn’t shown on the menu bar, you should turn it On under System Preferences > Sound > check in the box of Show Volume in the menu bar.
In either way, you will end up connecting your AirPods to macOS. With this, you shall experience wireless media listening. To stay tuned with useful tips and tricks, you shall visit our blog.