
Apple has recently launched a new feature for AirPods called Ear Tip Fit Test. The feature can be seen only in devices with iOS 13 or later versions. It is a new feature that helps users find the right ear tip size. Currently, this ear tip fit test can be done only in AirPods Pro. Further, AirPods Pro has three sizes of ear tips: small, medium, and large. AirPods Pro comes pre-installed with a medium-size ear tip. The users can change the ear tips based on the Ear Tip Fit Test results. In this blog, we’ll look into the complete guide on how to perform the Ear Tip fit Test for AirPods Pro.
Benefits of Doing Ear Tip Fit Test
Choosing the best fit helps users experience the audios in high quality. Furthermore, it gives the users an immersive experience while listening to songs. In addition to this, there are some other benefits that user experiences by selecting the right ear tip size.
- Enhance Sound Quality
- Active Noise Cancellation
- Deeper Bass and So on.
How to Perform Ear Tip Fit Test on AirPods Pro
Go ahead with the steps given below with AirPods Pro on your ears.
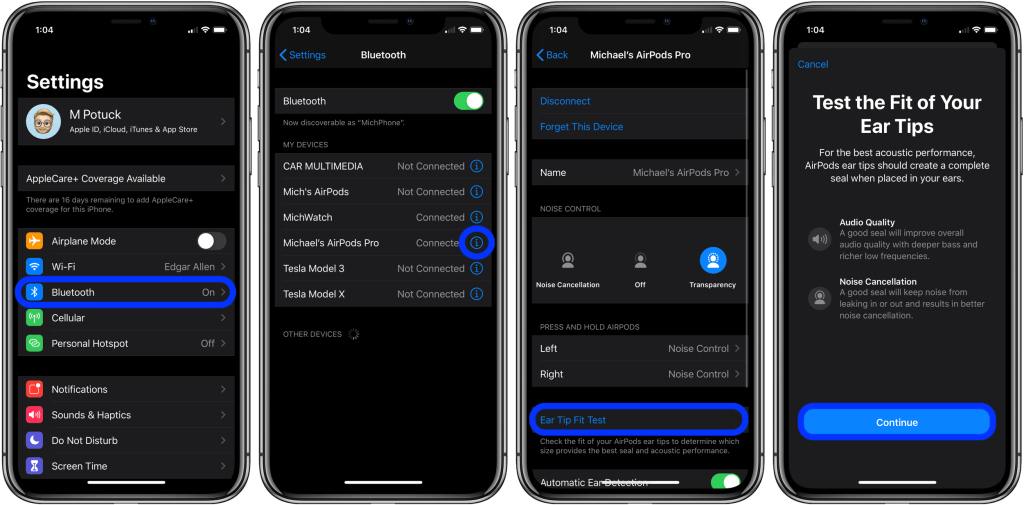
1) Keep your AirPods Pro connected to your iPhone/iPad.
2) Go to the Settings app on your iPhone.
3) Scroll down and select the option Bluetooth.
4) The name of the connected devices appears on the screen. Tap the “i” icon displayed next to the name of AirPods Pro.
5) Click on the option Ear Tip Fit Test, and tap Continue.
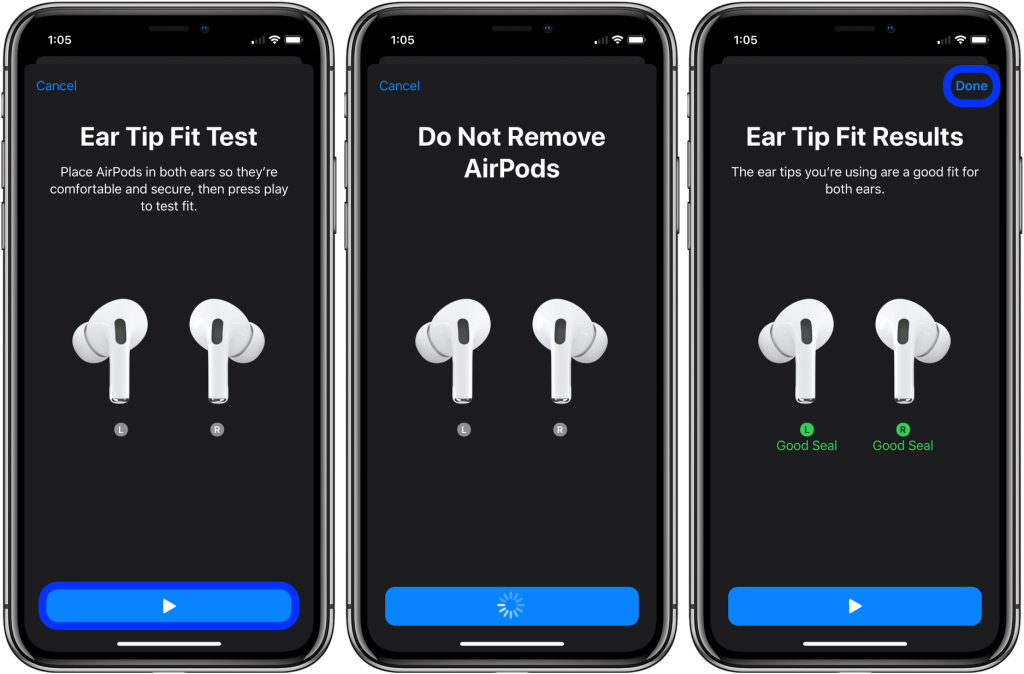
6) Now, place the AirPods Pro on your ear and tap the Play button displayed at the bottom.
7) It’ll take a few minutes to test both earbuds.
8) If the AirPods are nestled correctly, you get a message, Good Seal under each AirPods.
9) If not, it displays a message Adjust or Try a Different Ear Tip. In that case, remove the Airpods and try it with another size.
10) After completing the test, tap Done.
Related: How to Share Audio With AirPods in 2 Minutes [Easy Guide]
How Does AirPods Fit Test Work
The size of ear canals is not the same for all persons. It may vary from person to person. Doing this test clarifies the ear tip size we should choose for our AirPods. After tapping the play button, the microphones inside the AirPods register for any sound leakage. If there are zero sound leaks, it displays a message “Good Seal” under the Airpods. If the ear tip size does not fit you, there will be an increase in sound leakage, and if this is the case, it displays a message “Adjust or Try a Different Ear Tip.” As a result, the user can switch to the next size and can redo the test to know about the fit. The fit test uses advanced algorithms to test the AirPods Pro and suggests the fit results with deeper analysis.
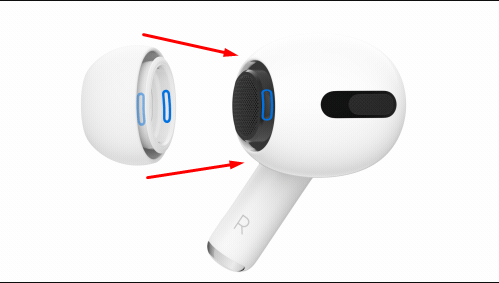
How to Change Ear Tips
1) Pull gently at the base of the ear tip and remove the default medium size ear tip.
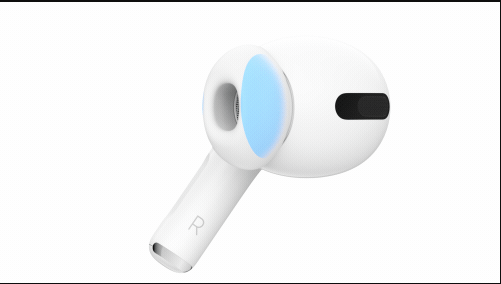
2) Take the larger or smaller ear tips from the AirPods Pro box.
3) Just put the selected ear tip firmly in the oval-shaped connector on the AirPods.
Related: How to Connect AirPods to iPad in 2 Minutes [All Models]
That’s it. Follow the above-given steps and perform the ear tip fit test to select the suitable size. Sometimes the fit results show negative for all three sizes of ear tips. In that case, start moving the position of ear tips in your ear and redo the test. If the results indicate negative again, the next step is to clean your AirPods Pro. Before cleaning, follow the steps given by Apple to clean your AirPods. Hope this blog helps you to perform a Fit test. To know more about Apple Products, visit our blog.