
Trackpads are touch-sensitive flat surfaces that allow users to navigate using finger gestures on the iPad’s screen. The functions of the mouse and trackpad are the same. The stylish look and highly appealing design make the device popular. Due to its less weight, users can carry the trackpad anywhere. Pairing and using the trackpad with an iPad gives a good feel to the users. It is especially true when you are using an iPad to replace your laptops. The trackpad allows the user to control and navigate the cursor by moving his fingers. You can tap on the trackpad to select an option. In addition, the users can customize the touch settings in the Assistive touch option. Most of the time, the users find it difficult to connect the trackpad to the iPad. In this blog, we’ll walk you through the steps to connect the trackpad to iPad.
How to Pair Bluetooth Trackpad to iPad
Before proceeding with pairing, the first thing you should do is to keep the two devices closer and turn on the trackpad. After setting up your trackpad in pairing mode, follow the steps given below and connect your trackpad to the iPad.
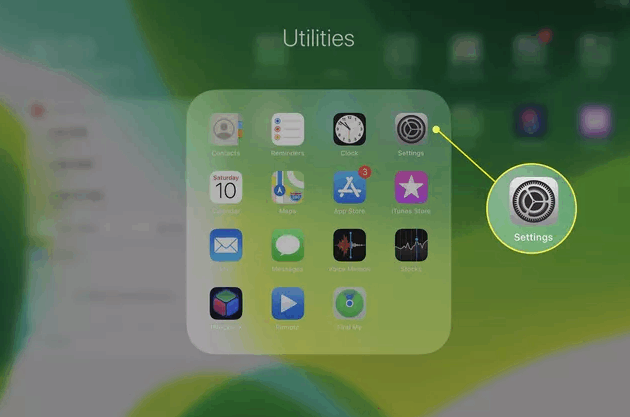
1) Unlock your iPad and go to the Settings app.
2) Select Bluetooth from the list of options displayed on the screen.
3) The Bluetooth settings will appear on the right side of the screen.
4) Under Other Devices, you can see the name of the Trackpad.
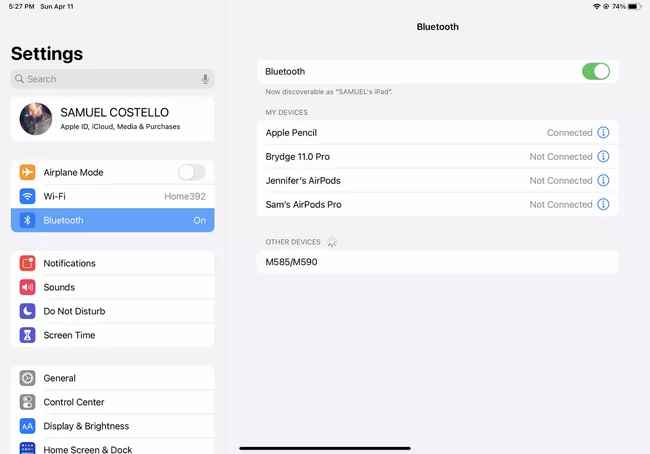
5) Follow and complete the on-screen prompts and select the option Pair.
6) Now, your trackpad is connected to the iPad, and the screen displays the circular pointer.
7) The circular pointer moves when you use the trackpad.
How to Use Trackpad with your iPad
The section covers the details related to adjusting and customizing the trackpad.
Adjust Tracking Speed of your Trackpad
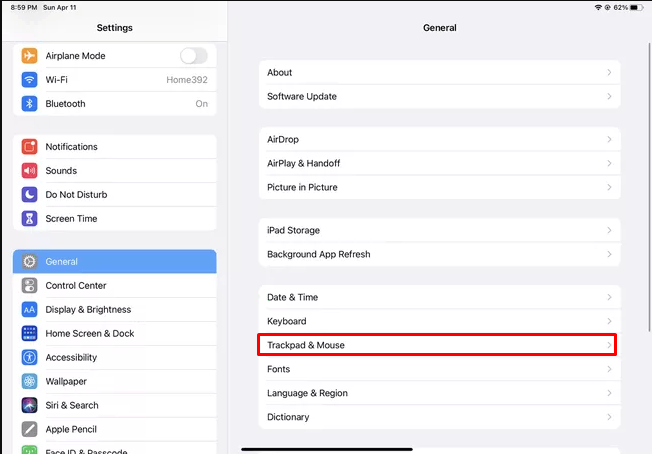
1) Open the Settings app on your iPad.
2) Tap the option, General.
3) You can see a list of options on the right side. Select the option Trackpad & Mouse.
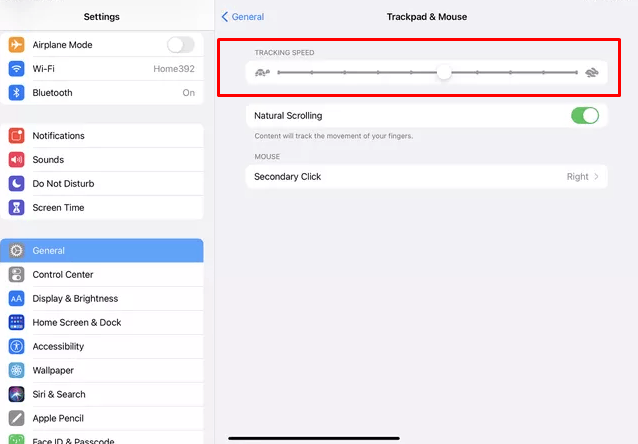
4) There will be a slider under the heading Tracking Speed. Move the slider to the right or left to increase or decrease the tracking speed.
Related: How to Connect Apple Pencil to iPad in 2 Ways [All Models]
Change the Color and Size of Circular Pointer
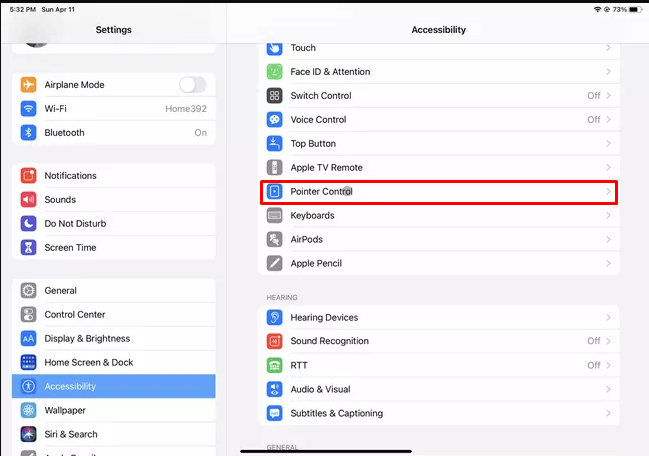
1) On the iPad, navigate to select and open the Settings app.
2) Navigate to the bottom and click Accessibility.
3) Tap the option Pointer Control.
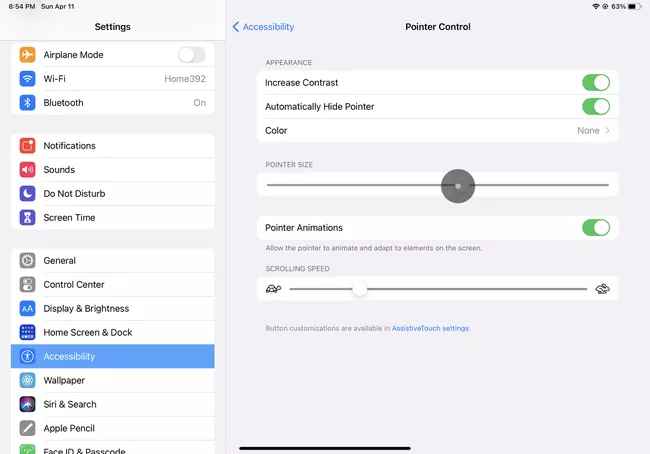
4) You’ll be navigated to pointer settings. You can see a slider under the heading Pointer Size. Moving the slider to the right increases the size of the circular pointer and vice-versa.
5) You can see an option Automatic Hide Pointer on the screen. Enabling this option hides the circular pointer when the trackpad is not in use. To show it again on the screen, just tap the trackpad. To enable this feature, select the toggle switch.
6) There is also an option to change the color of the pointer. Click on the option Color. When a new window appears on the screen, choose your desired color from the list of in-built color options.
Enable Assistive Touch and Enhance Trackpad Functions
1) Launch Settings on your iPad
2) Locate and click on the option Accessibility.
3) Select the option Touch in accessibility settings.
4) Tap the toggle switch next to Assistive Touch to enable it.
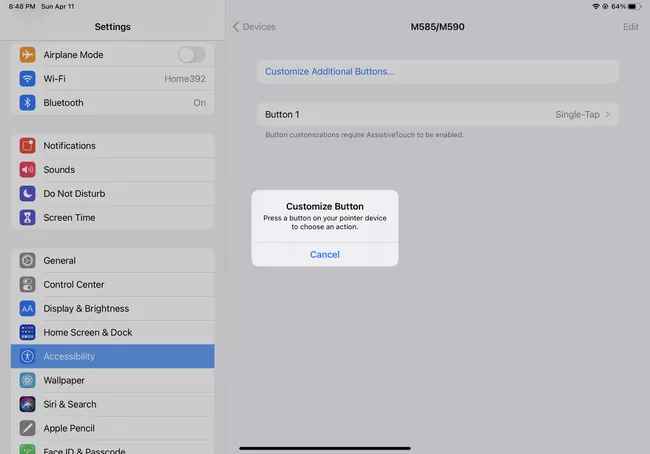
5) Scroll down to the end and click Devices.

6) You can see your trackpad name on the new screen.
7) Select your trackpad name, tap Customize Additional Buttons and start customizing the touch gestures.
Related: How to Connect a Mouse to iPad in 2 Minutes [Possible Ways]
Note: Magic Trackpad will disconnect if you turn off its switch. It disables when you move it out of the Bluetooth range.
That’s it. Connect your trackpad to your iPad by following the simple steps listed above. If you’re annoyed by using the same color pointer, you can change the pointer color of your choice. In addition to this, there are some settings you can customize. The procedures to customize trackpad settings are given above. The Magic trackpad is the best and an excellent choice for your iPad. Hope this blog has guided you to pair the trackpad to an iPad. To know more about Apple products and updates, visit our blog.